¶ Overview
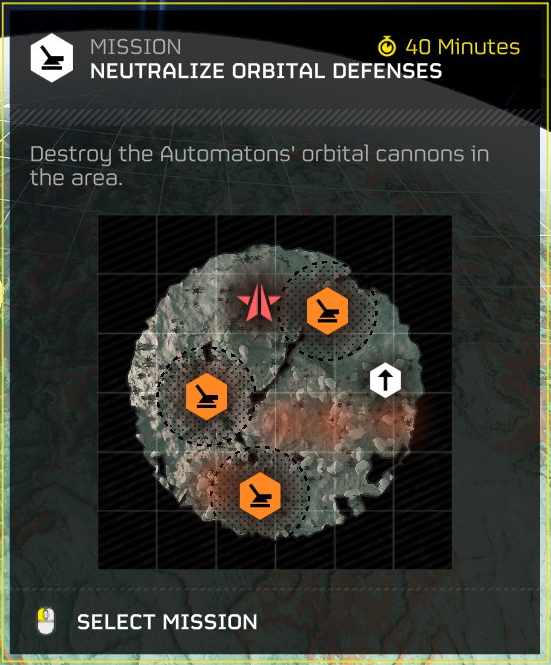
This is an Automaton-only mission that spawns 2 Orbital Cannons at level ![]() 4 | Challenging and 3 past level
4 | Challenging and 3 past level ![]() 6 | Extreme.
6 | Extreme.
Each Orbital Cannon can only be destroyed with one of the following means:
- Hellbomb
- Portable Hellbomb
- Mini-Nuke (SEAF Artillery)
Therefore, playing aggressively on this objective is a viable option as well as stealth.
Static Automaton guards vary drastically across difficulty levels and different variants, therefore you can expect heavier confrontations on high difficulty missions/variants.
There are 4 variants in total. 2 variants are on flat terrain, the other 2 are on mountainous terrain.
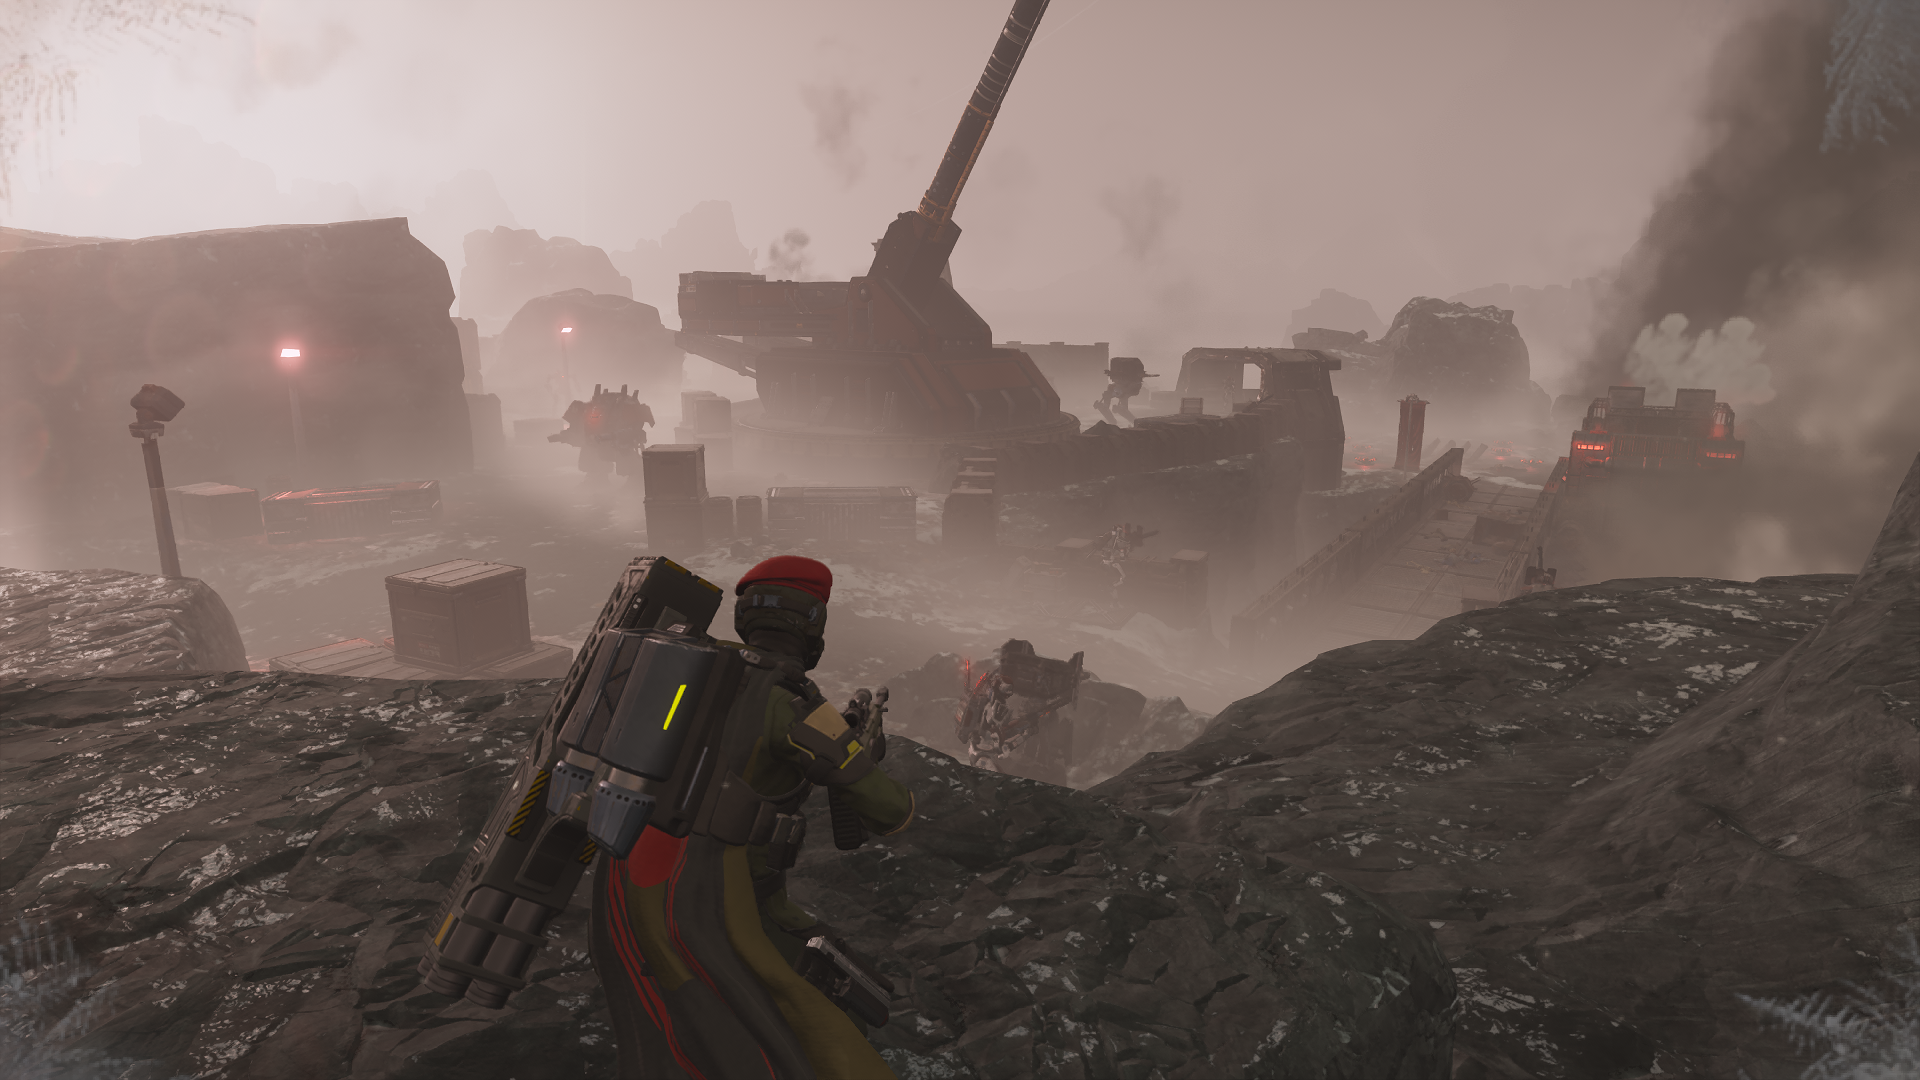
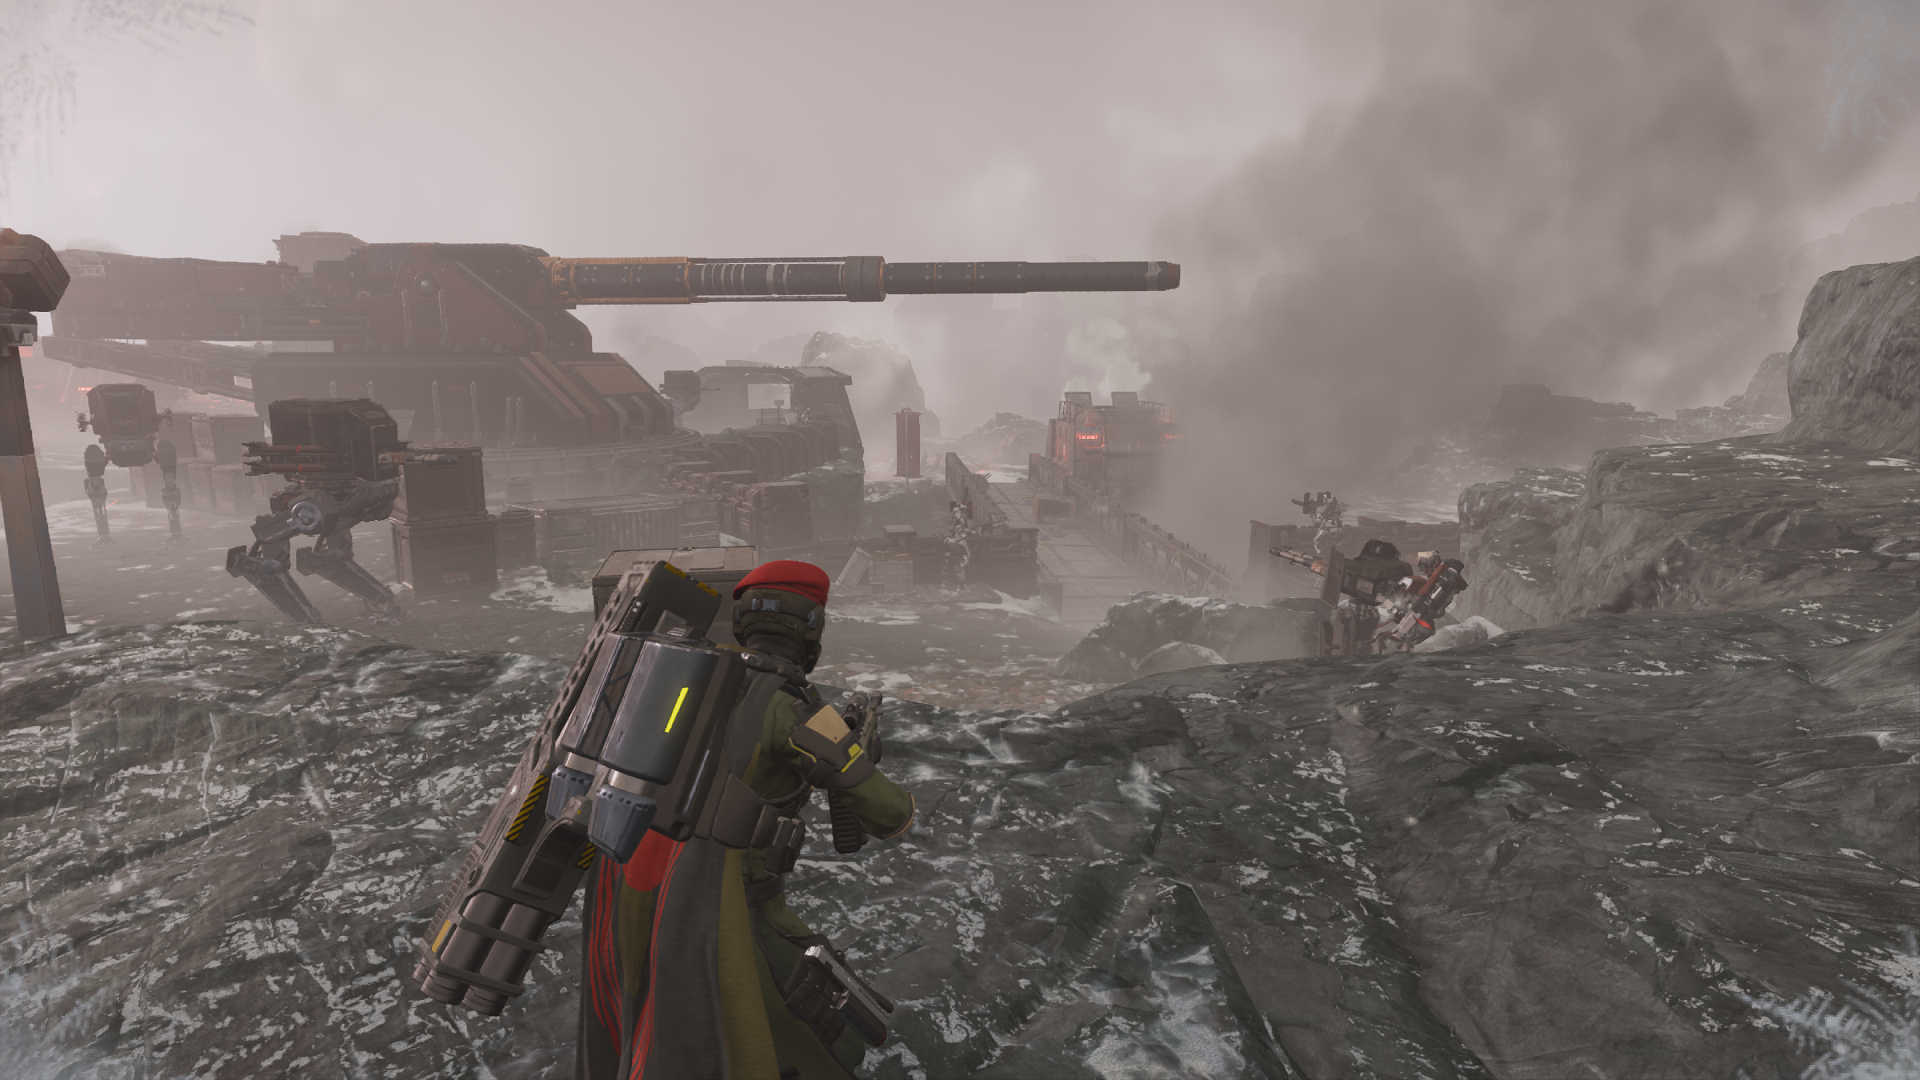
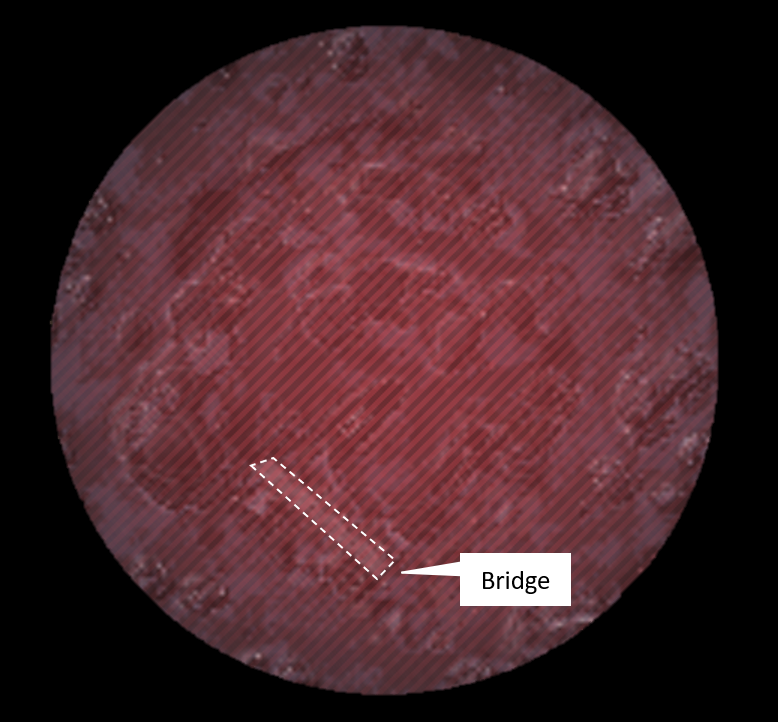
¶ Bridge
Viable for speedrun.
Named due to the front entrance of the objective being a long connecting bridge.
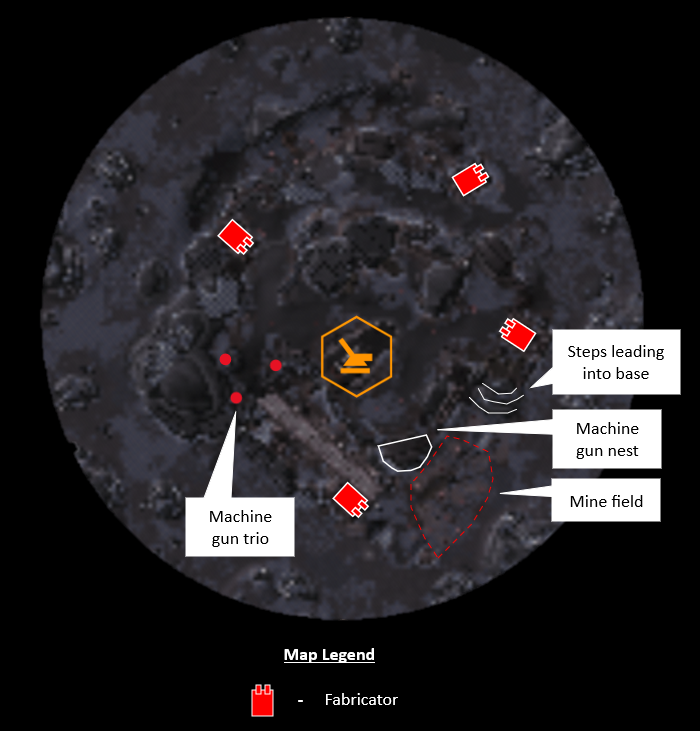
This Orbital Cannon variant is situated on flat terrain. The main feature of this variant is a bridge path guarded by 3 machine gunners. If you fall off the bridge on either side, the pit instantly kills you.
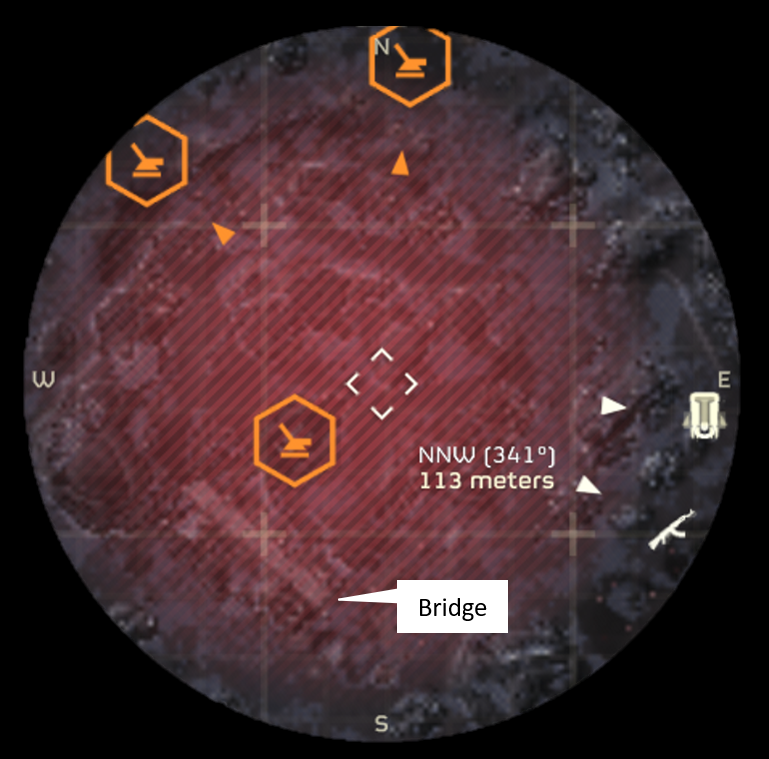
¶ Identifying Features
Visually: Orbital Cannon is on flat terrain, the front entrance is a bridge.
On the map: The bridge shows up as one thin long white strip. A lighter shade than anything else in the compound.
¶ Layout
¶ Variant Completions
¶ Zovc's Climbing Entry Method
Entry route should remain consistent, but the density of enemies surrounding the cannon can vary drastically.
Suggest being prepared to kill or otherwise disable enemies in order to place a Hellbomb or use a Portable Hellbomb safely.
¶ Clark's Behind Rocks Entry Method
Entry route is consistent, it doesn't matter what strategems you bring as long as you can get the job done.
I recommend destroying any fabricator immediately near you just as an extra precaution to ensure you and the Hellbomb survive.
I also put smoke on the Hellbomb to conceal it but its not necessary.
Be careful shooting around the cannon because the hitboxes are fucked up and so some shots may be blocked.
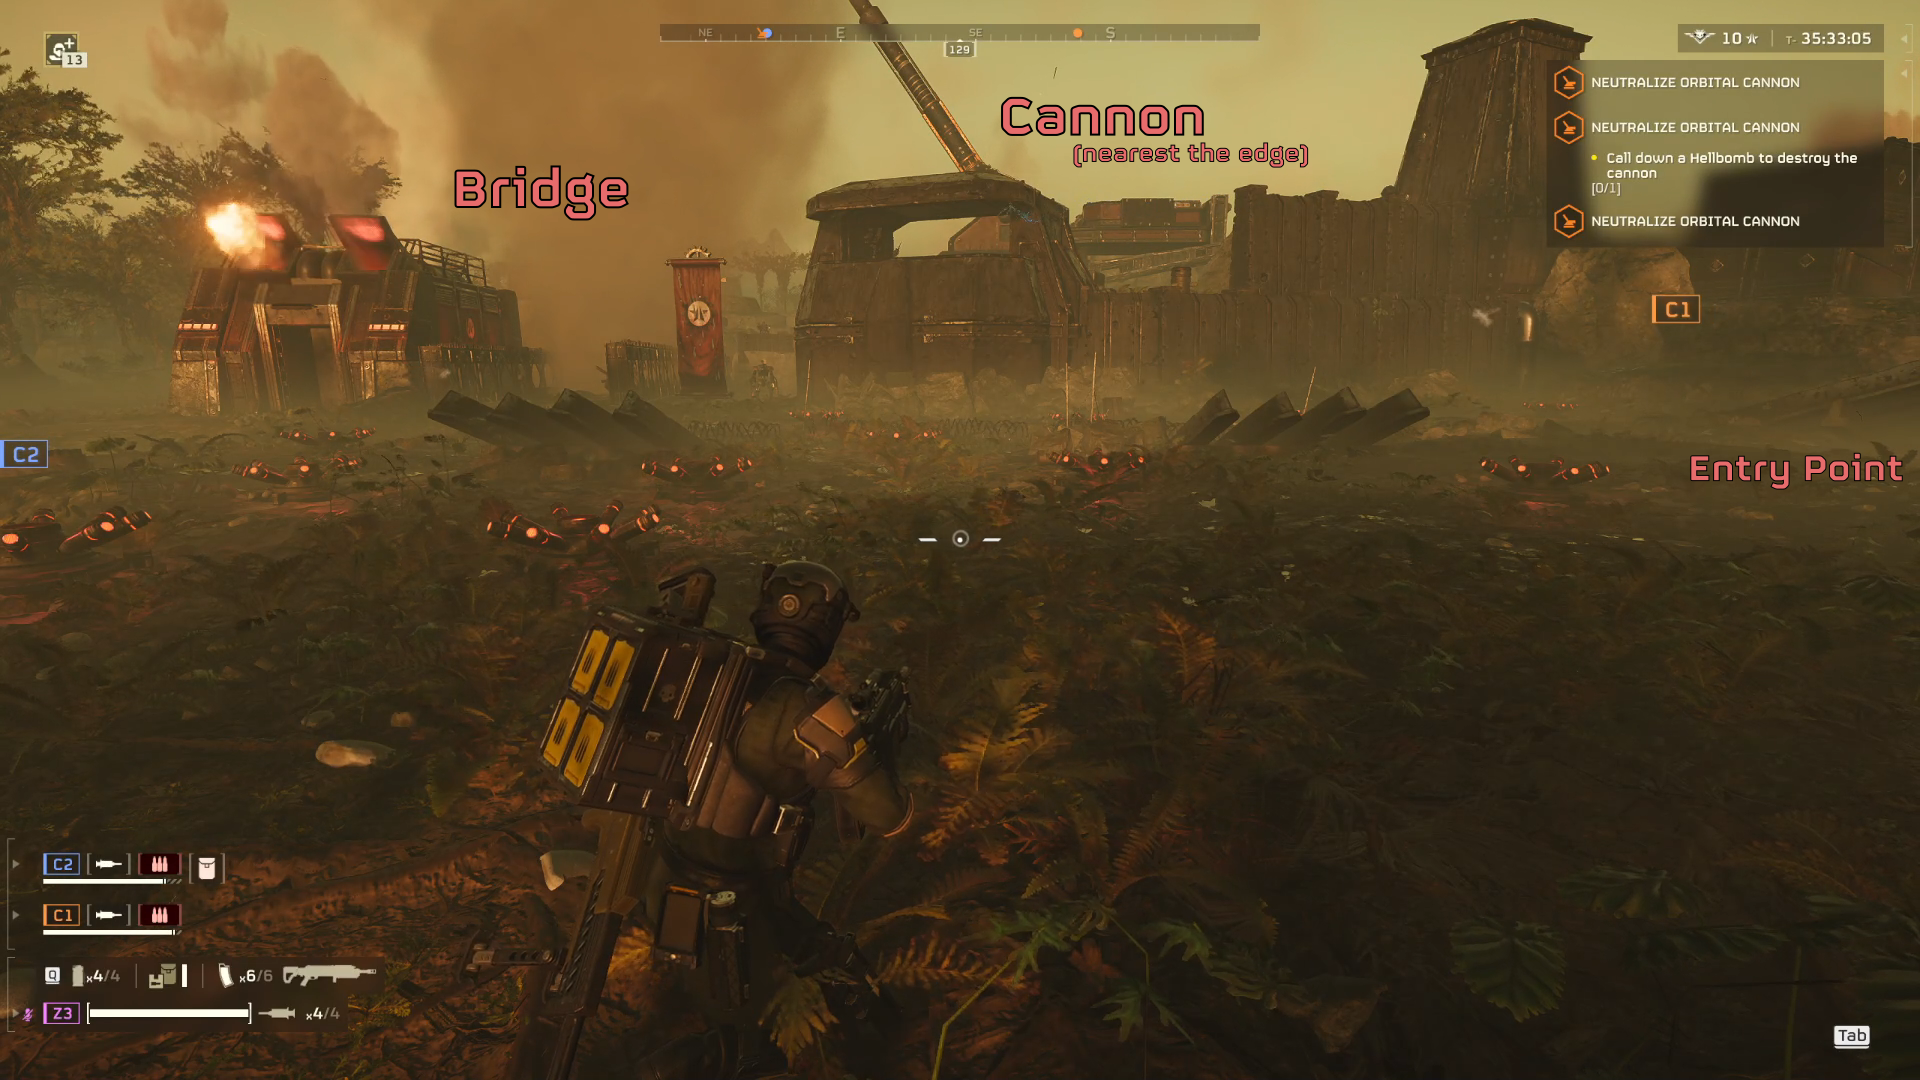
¶ Sarge's Bridge Hellbomb Placement
This is a setup with all the enemies in place, no dropships baited out.
I didn't get any hulks at the cannon but a Commando combined with an Orbital Laser should be more than enough.
You can either take the Eagle Airstrike or the Eagle 500kg Bomb, but I think that a well thrown Eagle Airstrike is better because it's more likely to kill more Automatons.
Destroying the fabricator at the beginning is quite important so the Orbital Laser doesn't target it. But if you choose to let it be, stay away from it because it can knock you out of the rock.
When you go in to call the Hellbomb, it's good to have the Jump Pack off cooldown so you can instantly jump on the bridge.
¶ Greenland
Viable for speedrun.

¶ Identifying Features
Visually: Orbital Cannon is located in a grassy colony area.
On the map: one of the few colony tiles with grass including large cliff structure thats very distinct from the rest of the colony tiles.
¶ Layout
¶ Mount Fuji (Easy)
Viable for speedrun.
This variant is situated on mountainous terrain.
Its main feature is that the Orbital Cannon is located at the edge of the compound (as opposed to the middle like all the other variants).
It’s protected on its flanks by a steep cliff face and two fabricators.
This is also the easier mountain variant to infiltrate, the other one is much harder.
¶ Identifying Features
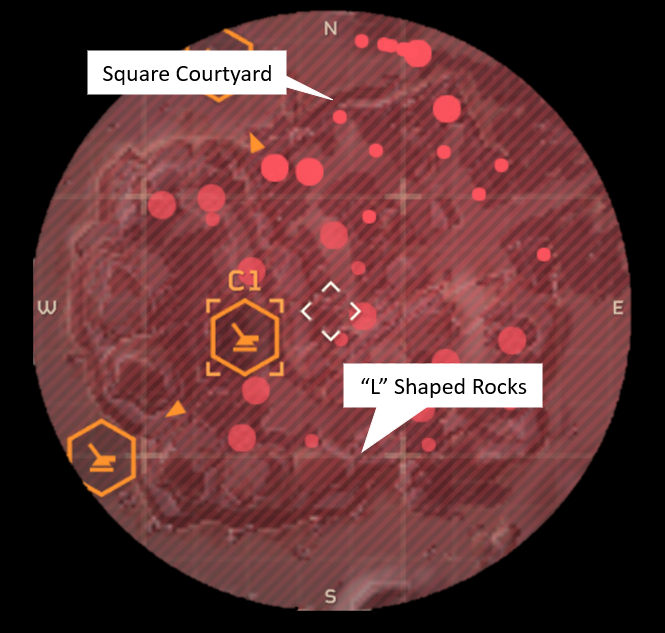
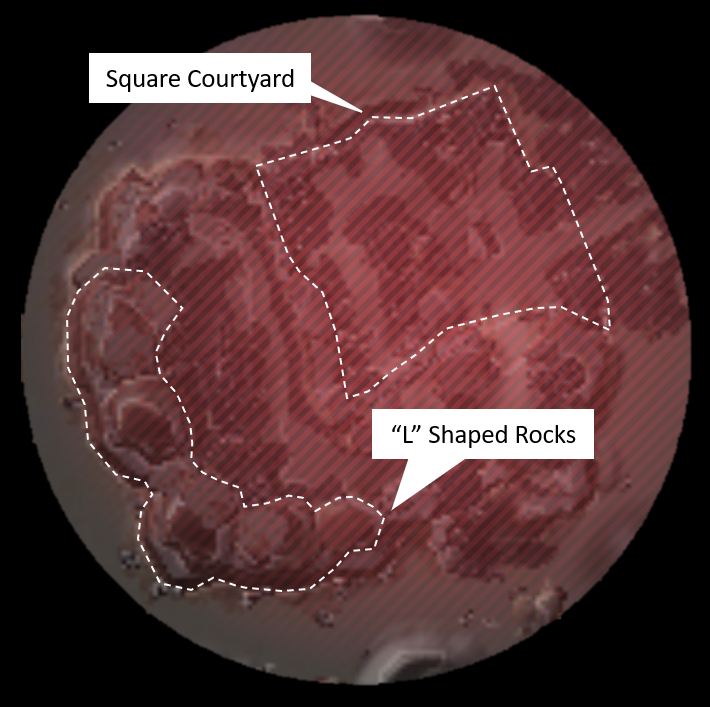
Visually: Orbital Cannon is on mountainous terrain. It is on a plateau near the rock cliffs.
On the map: Large continuous rock formation at the edge of the compound, forming an "L" shape. It’s hard to see but there’s also a square shaped inner courtyard.
¶ Layout
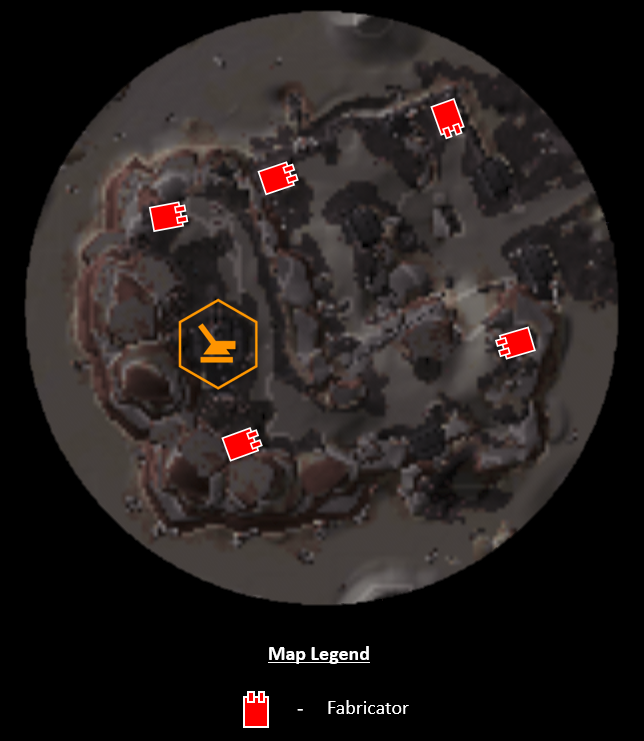
There are machine gun nests present in this compound but most are situated by the "front" which is the path of most resistance.
Because there are ways to bypass almost all defenses, they are not included in this layout map.
¶ Variant Completions
¶ Clark's Jump Pack and Orbital Smoke Method
Quick, easy, and medium to low risk.
I approach from the Northwest corner of the compound into a little divot that I can scale with a Jump Pack.
This path is also accessible by climbing although it takes more practice.
I basically employ the same method of execution as all my other Orbital Cannon guides where I Jump Pack through a gap in enemy defenses, plant the Hellbomb, throw Smoke, and leave.
¶ Hadokken's Distraction Method
Uses the Jump Pack and Thermite grenades.
Taking a similar entry to Clark's method, however, using a Thermite on the fabricator will have Automatons go investigate when it explodes (at 31s).
Use this time to scale the mountain and drop back down next to the Orbital Cannon, then plant the Hellbomb and get out with little to no resistance.
This method can be sped up by roughly 10s if you dive up the cliff, at the same place Clark starts, or where I start.
Clark's entrance is considerably more reliable diving, though in my experience I have been spotted more often doing so.
To maintain consistency and low risk, using the Jump Pack twice is advised.
¶ Mount Everest (Hard)
Not viable for speedrun. Avoid at all cost.
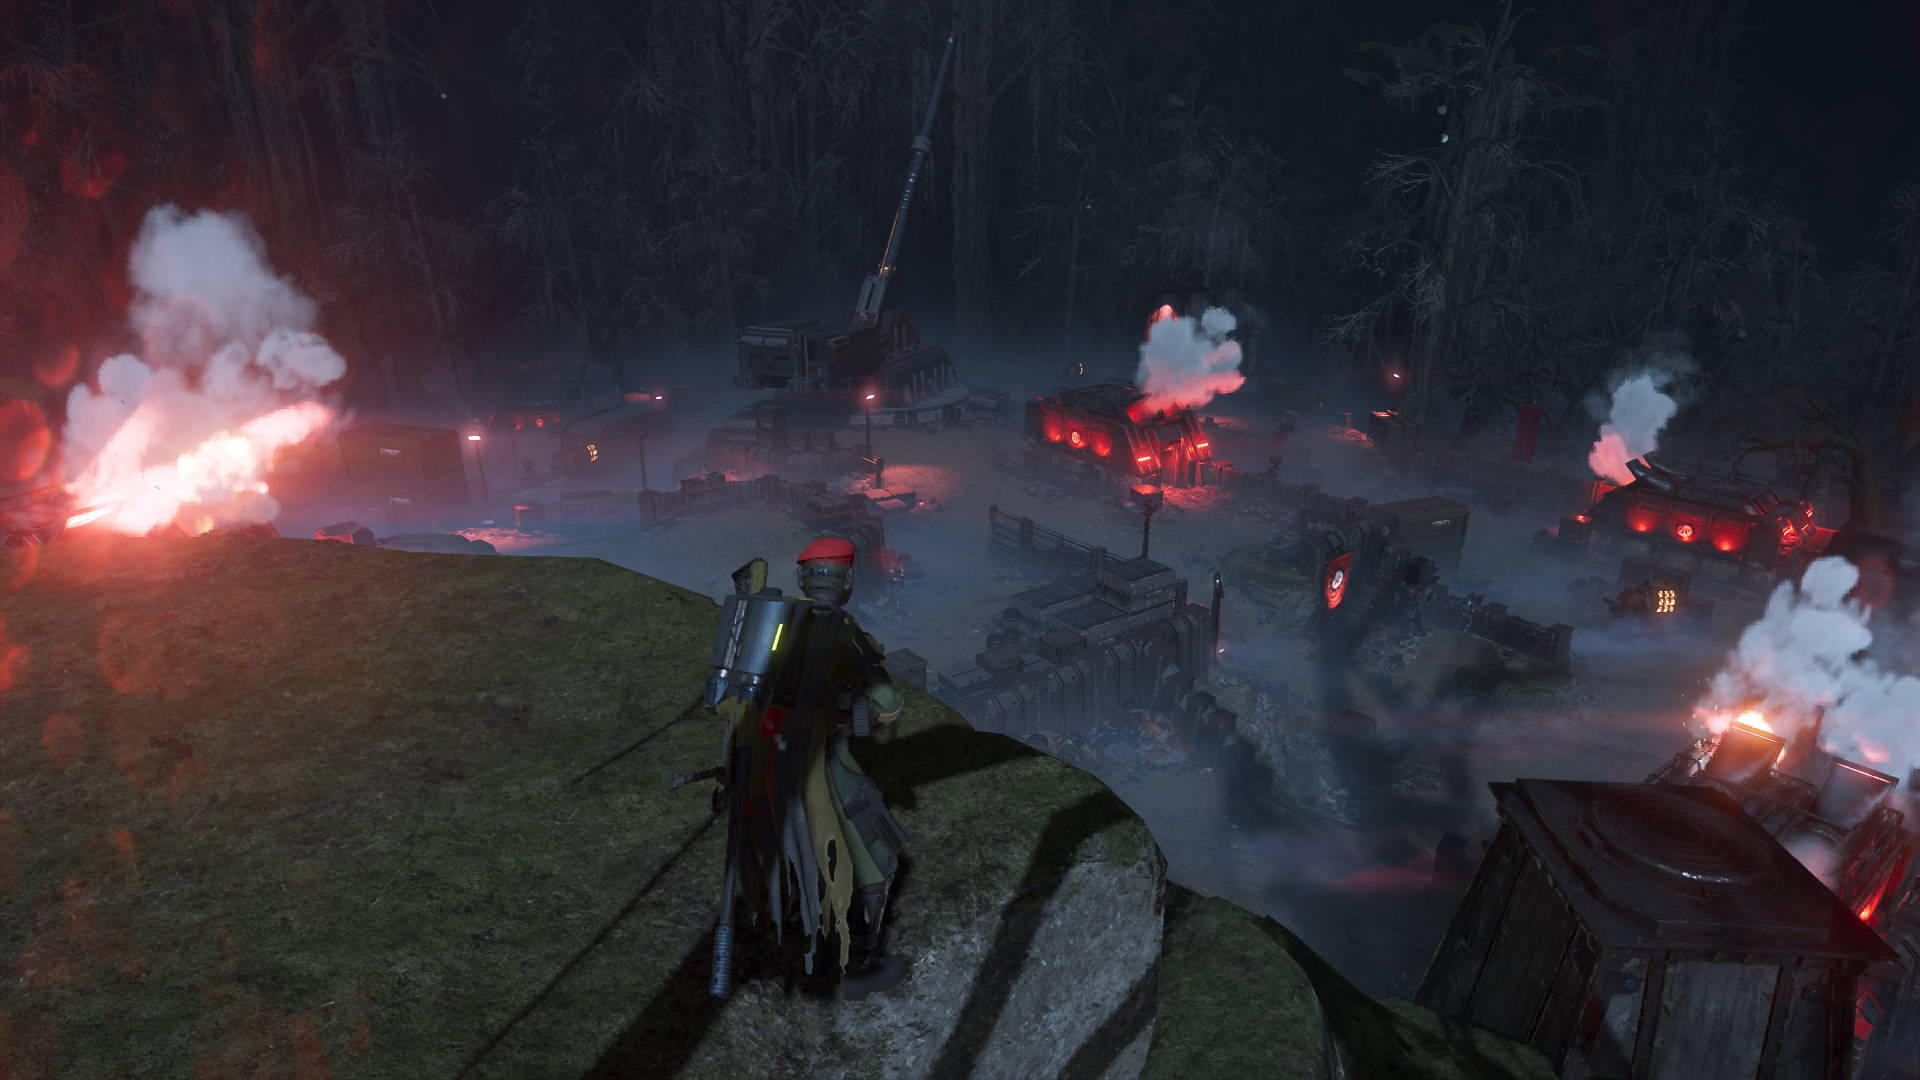
This variant is situated on mountainous terrain.
This is the hardest mountain variant to destroy. It’s the most protected variant as well as the hardest to sneak into.
¶ Identifying Features
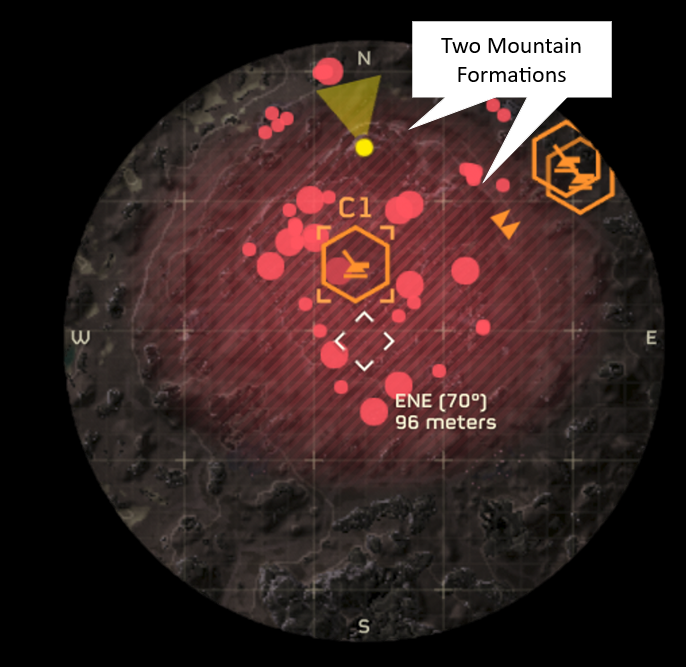
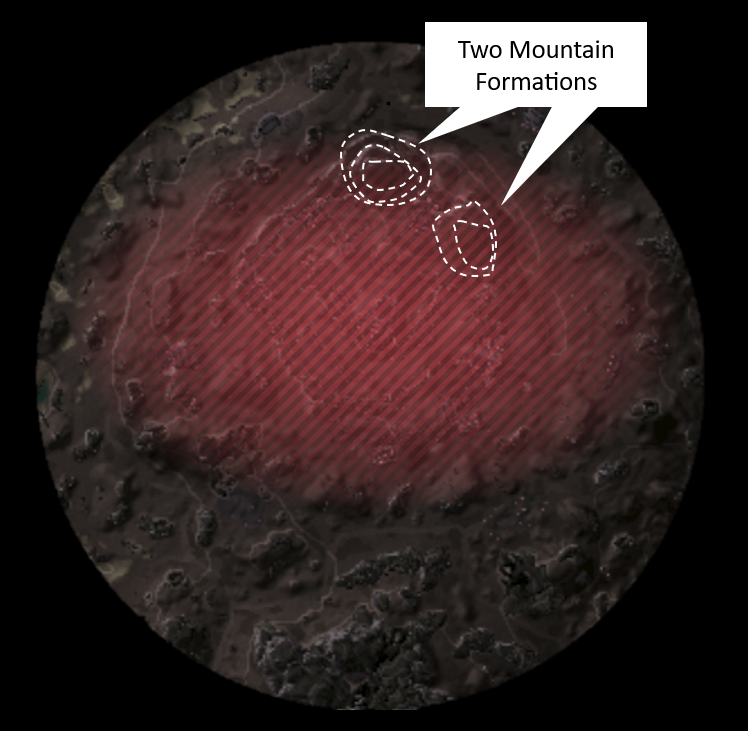
Visually: Orbital Cannon is on mountainous terrain. It is on a plateau near the rock cliffs.
On the map: Two mountain ranges side by side.
¶ Layout
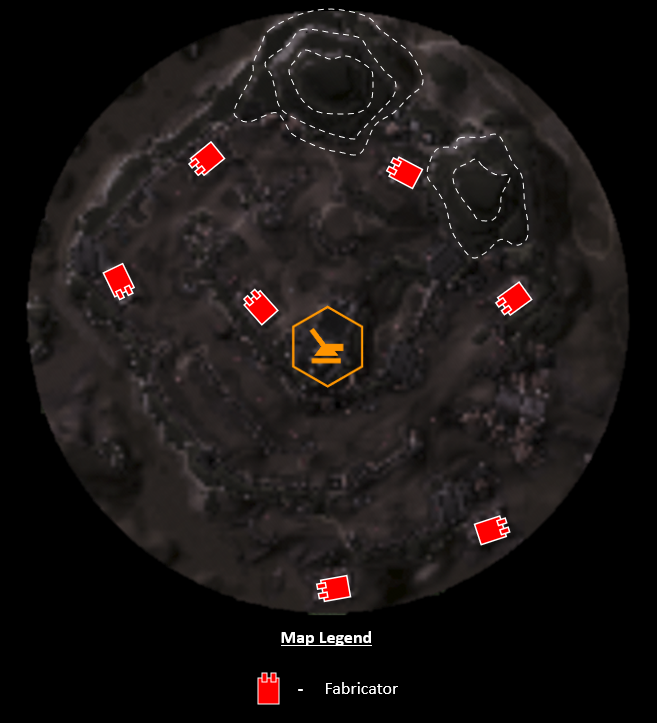
The sprawl on this map is huge, it almost doesn't fit in the map screenshot.
There are machine gun nests present on this compound although unmarked.
The biggest issue is infiltration. This place is littered with hulks, rocket striders and devastators - making it hard to go stealthy or loud.
¶ Variant Completions
¶ Clark's and Zovc's Jump Pack and Orbital Smoke Method
Pathing developed in tandem with Zovc. This method is slow, easy, and low risk.
The key part of this tactic is manipulating spawns by dropping near a different Orbital Cannon so it soaks up enemy spawns.
Afterwards, Zovc and I approach the target Orbital Cannon. This ensures an empty compound before beginning infiltration.
This tactic only works if you manipulate enemy spawns FIRST.
In a speedrunning scenario, this variant should not even be picked as a viable candidate barring special circumstances.
¶ Hadokken's Jump Pack and Smoke/Thermite
The route is pretty straight forward and low risk but slower than other methods.
You can use Smoke grenades, but can also just quickly take out any opposition or use an explosive to cause a distraction (Thermite grenade on the far right fabricator) before jumping down.
It's fairly safe as you're able to see the entire layout and pick off any Automaton before jumping down, with little to no retaliation.
Using the mountains gives you a high vantage point to snipe any fabricator/optional objectives with a Commando/Anti-Tank Emplacement.
I have noticed that some maps will let you stick stratagems up top while others it will bounce, so it comes down to if your stratagems sticks and how good the vantage point is in relation to the rest of the map.
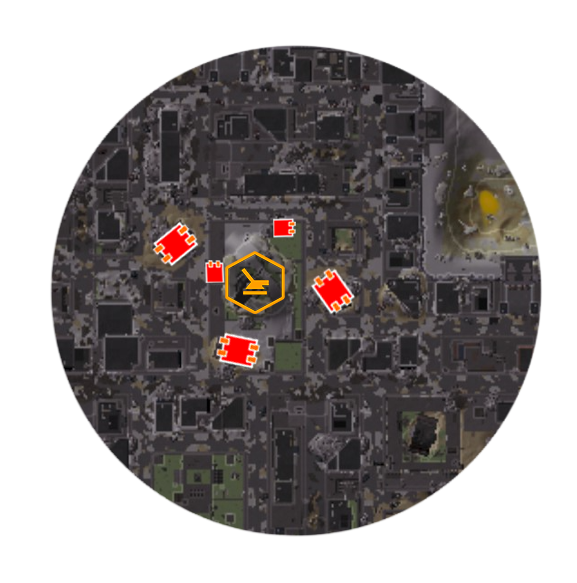
¶ Turret Island
Viable for speedrun.
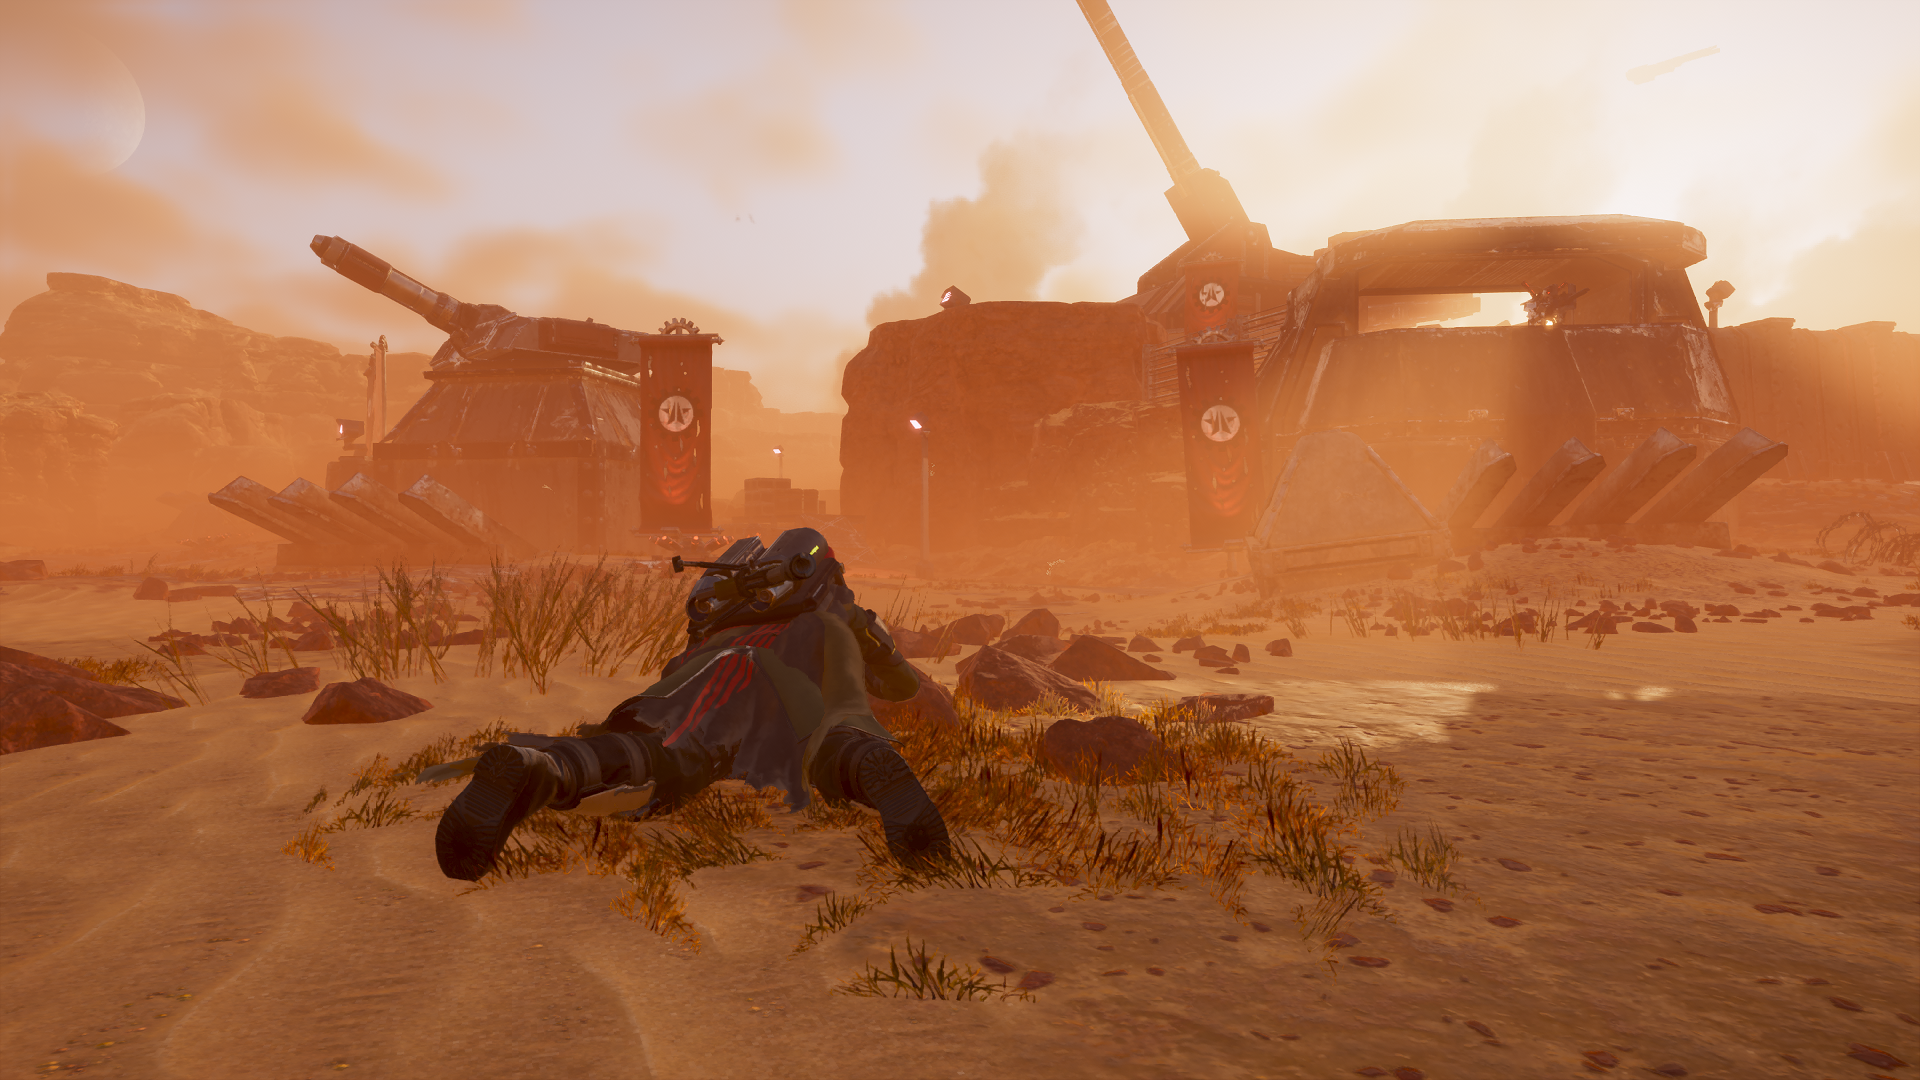
Located on flat terrain, the main feature of this variant are the cannon turrets protecting the Orbital Cannon.
It’s the only variant that has cannon turrets.
It also has the smallest footprint on the map compared to the other orbital cannon variants.
¶ Identifying Features
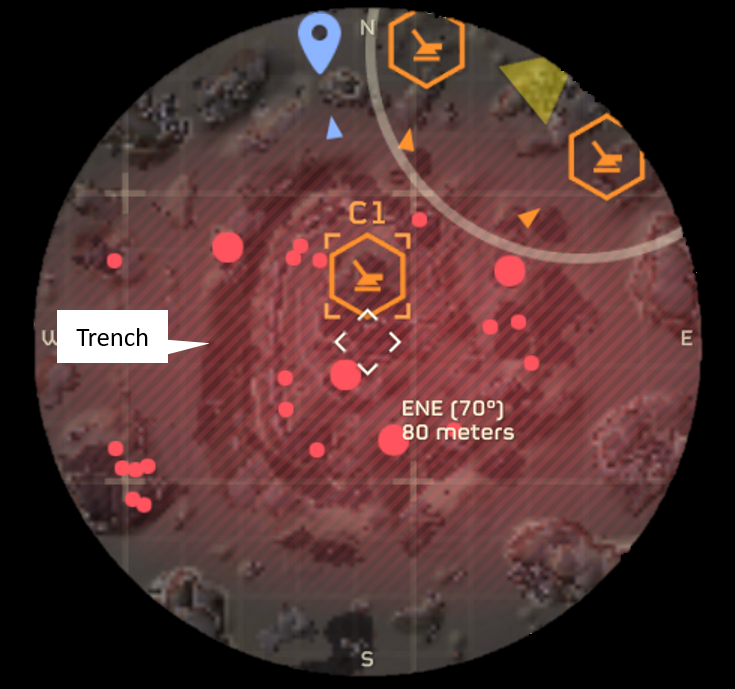
Visually: Orbital Cannon is on flat terrain, flanked by cannon turrets.
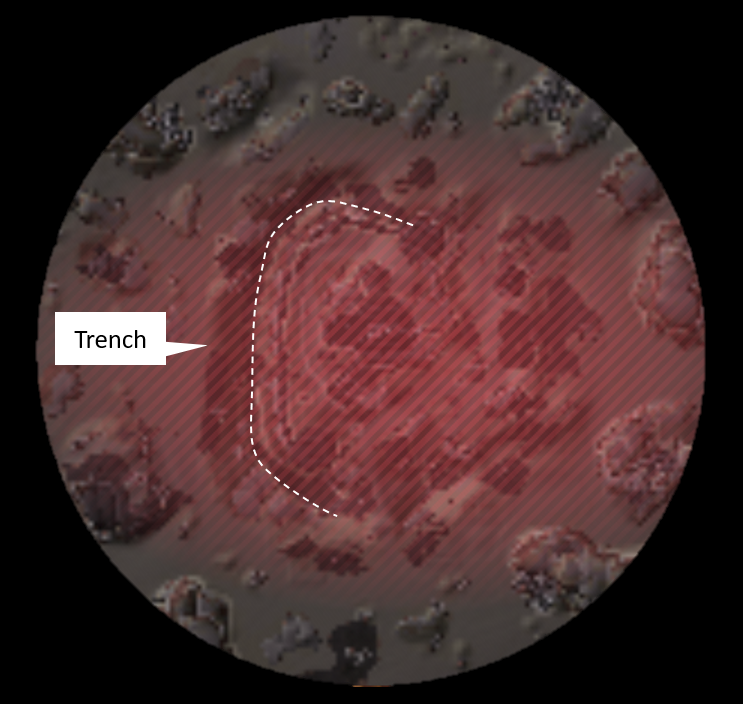
On the map: Very large trench that partially surrounds the entire compound in a “C” shape. Small map footprint compared to other orbital cannon variants.
¶ Layout
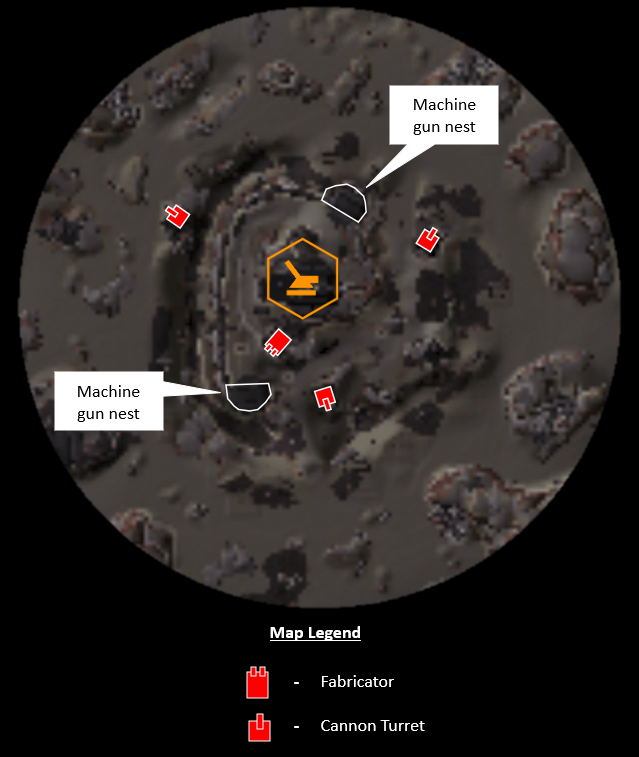
Only the nests have been marked but there are more machine gun positions littering the area, giving the compound close to 360 degrees of coverage.
Proceed with caution, there are minefields in the surrounding area as well.
¶ Variant Completions
¶ Clark's Jump Pack and Orbital Smoke Method
Quick, easy, but high risk. I use the Jump Pack through the North machine gun nest to gain access to the Orbital Cannon.
Then I put the Hellbomb down and smoke the area for concealment and use the nest as cover from the cannon turrets/surrounding enemies. Once the **Hellbomb is armed, I Jump Pack away.
If there were no enemies near me I would've taken the extra time to destroy the cannon turrets to make the area safer. Smoke is also not necessary but highly recommended to increase your chances of completing the objective.
¶ Hadokken's Jump Pack and Commando Method
Very fast and low risk way to clear this variant.
Start inside it and immediately call in the Hellbomb. Be careful since the stratagem can bounce if not thrown in the correct spot.
You'll need to destroy at least one cannon turret when you leave to avoid death with any anti-tank gear.
Jump Pack isn't required, but it makes exiting much safer.
When you begin arming the Hellbomb, cannon turrets will often begin targeting you, so you'll have to beat their turn radius and leave line of sight and Hellbomb radius to be safe.
¶ Credits
Clark and Rose for summarising objective information.
Zovc and MuxaRez for outpost layout icons and map legends.
Clark, Zovc, Sarge, Hadokken for main objective completion guides.
Prosecco and Rose for the creation of this page.