¶ Overview
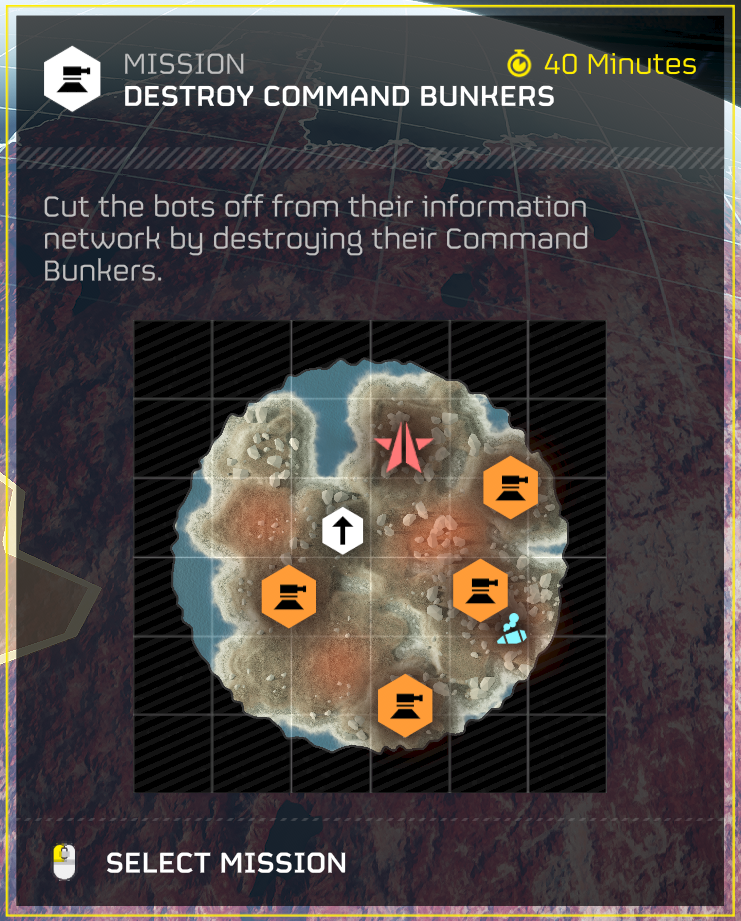
This is an Automaton-only mission that spawns Command Bunkers:
- 2 at level
 5 | Hard and
  6 | Extreme.
 - 3 at level
 7 | Suicide and
  8 | Impossible.
 - 4 at level
 9 | Helldive and
  10 | Super Helldive.
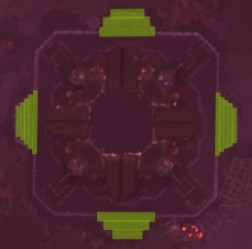
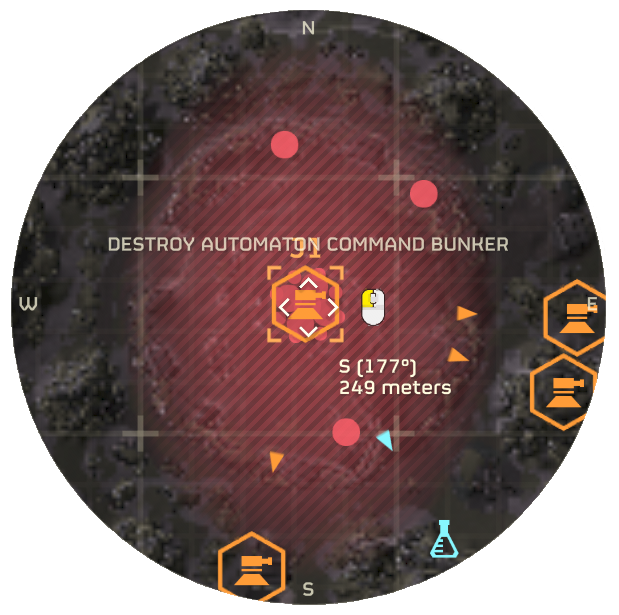
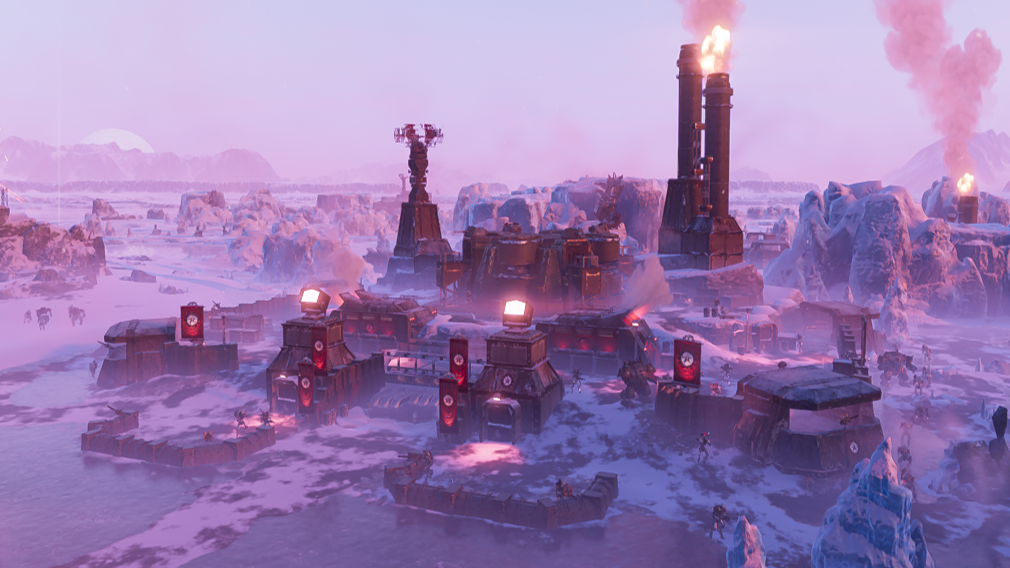
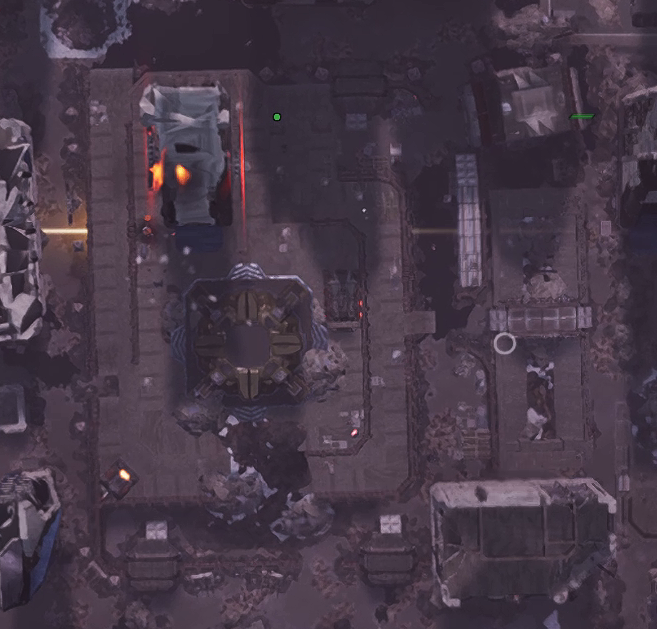
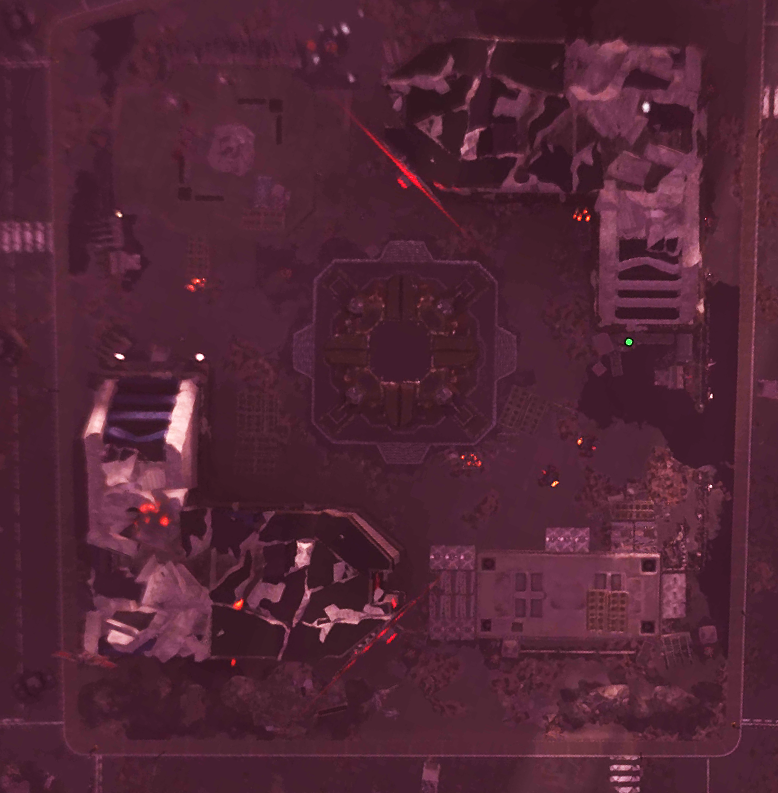
A Command Bunker is an Automaton structure defended by bunker turrets on all sides. They have 4 top turrets and fusion turrets in their walls.
They spawn within Automaton pseudo-outposts (with enemies and fabricators).
It is therefore advisable to destroy them from a distance, as bunker turrets have enhanced detection abilities, even while wearing Scout armor.
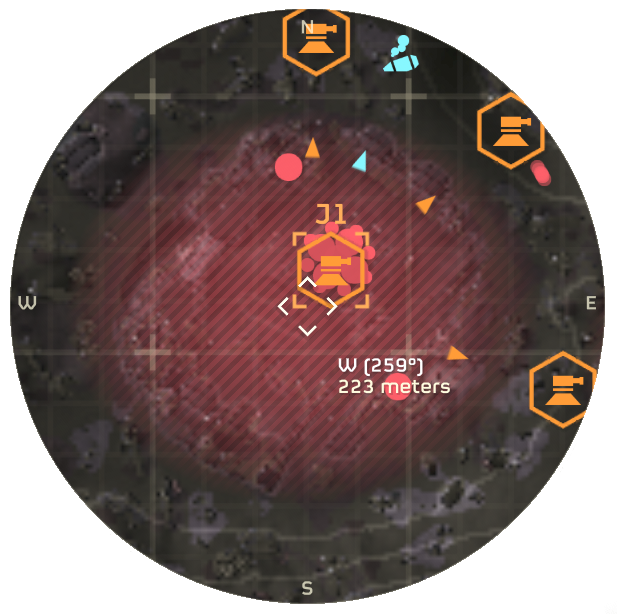
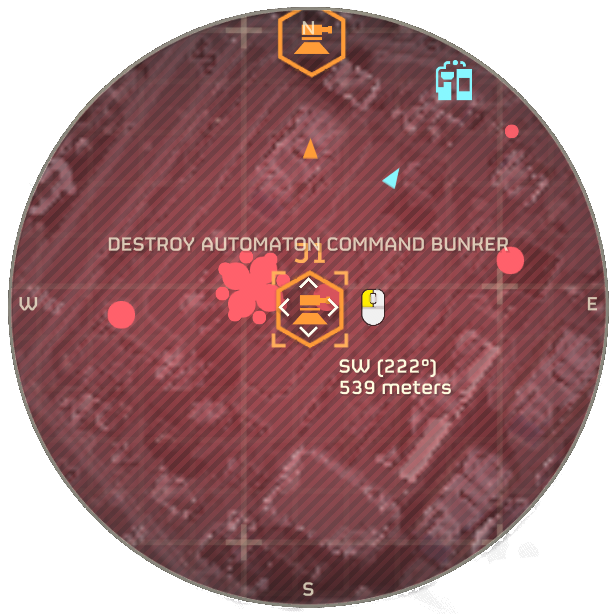
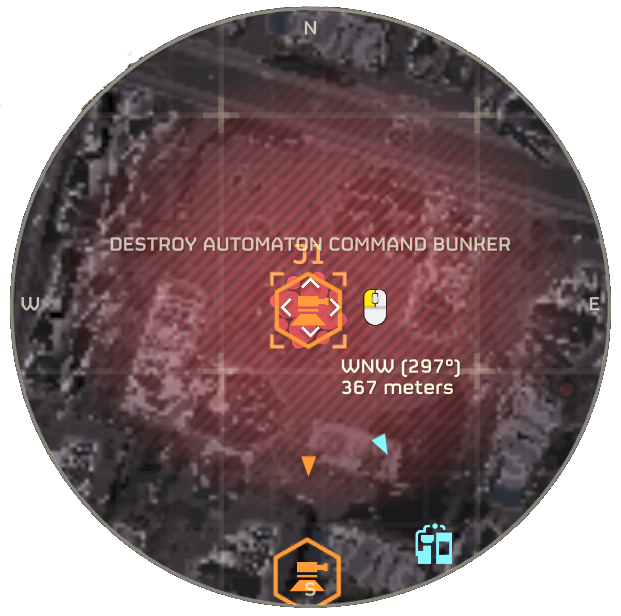
¶ Tip to spot them
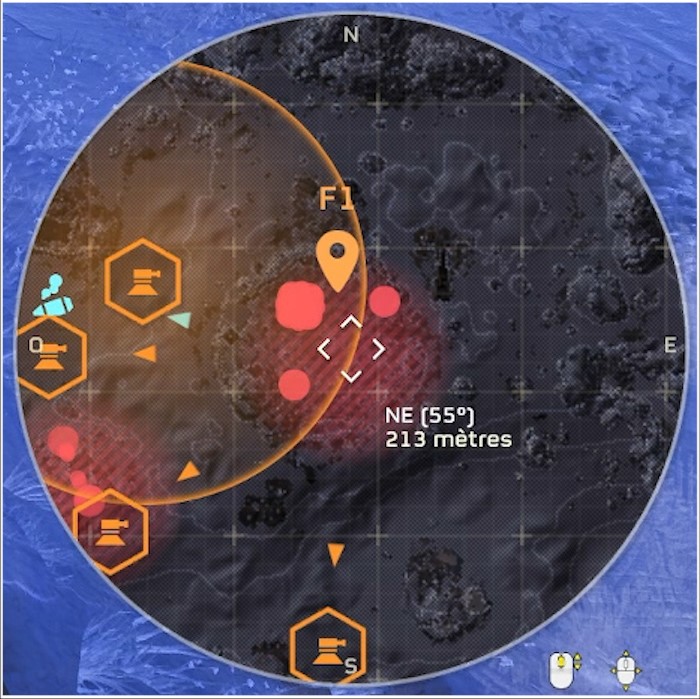
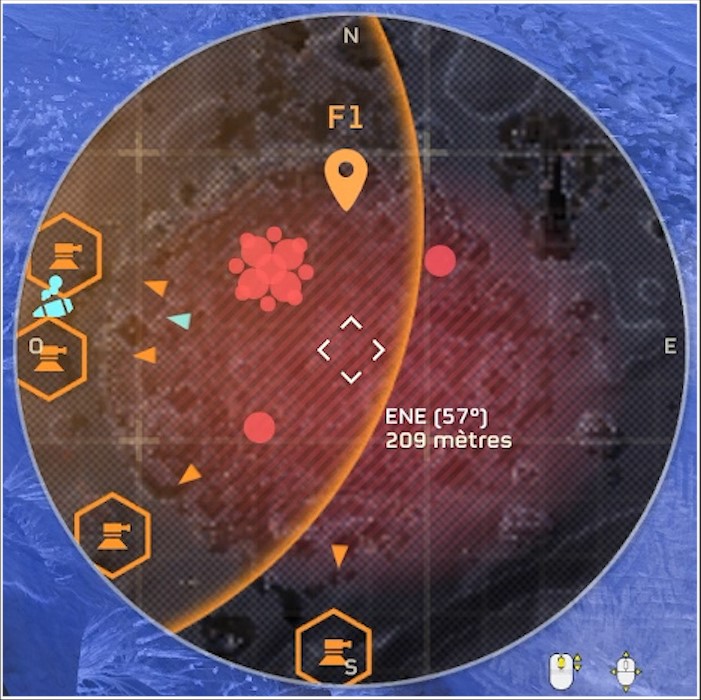
Requirement: any Scout armor. Unflinching passive works as well since patch 1.003.101.
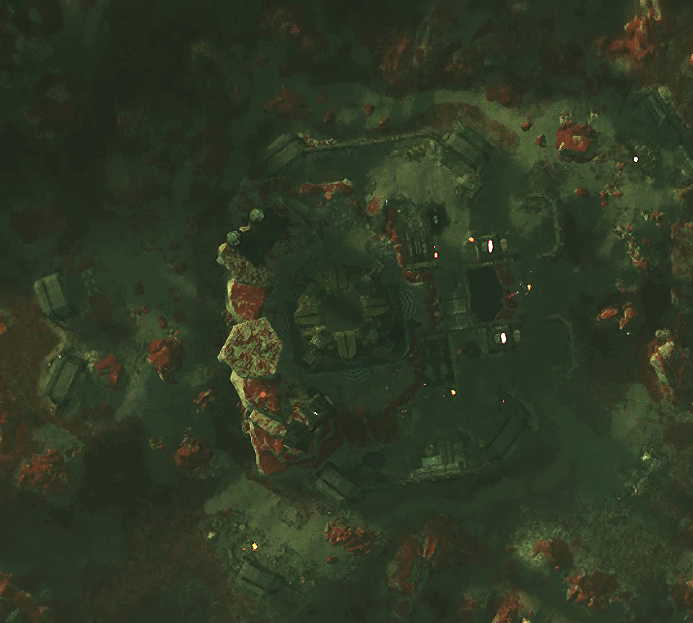
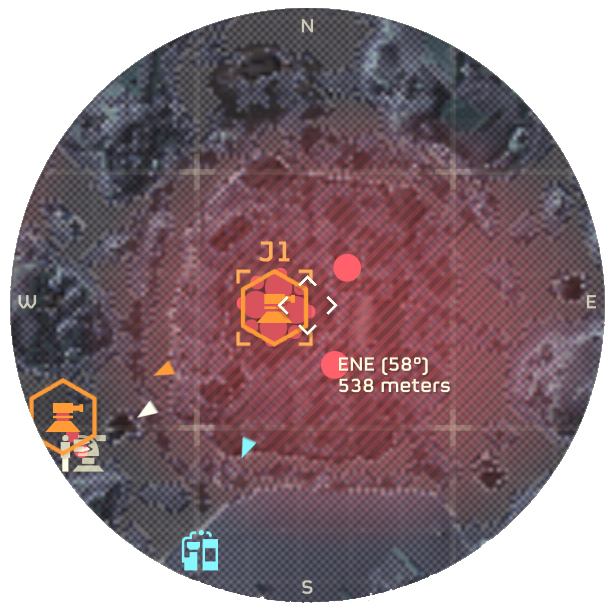
If you drop in a map with the Poor Intel modifier, scan the red areas with your pin for a specific shape.
It's a bigger, squarer dot than the fabricators/scout striders/hulks/heavy turrets.
When you zoom in, the floral shape is much more distinguishable.
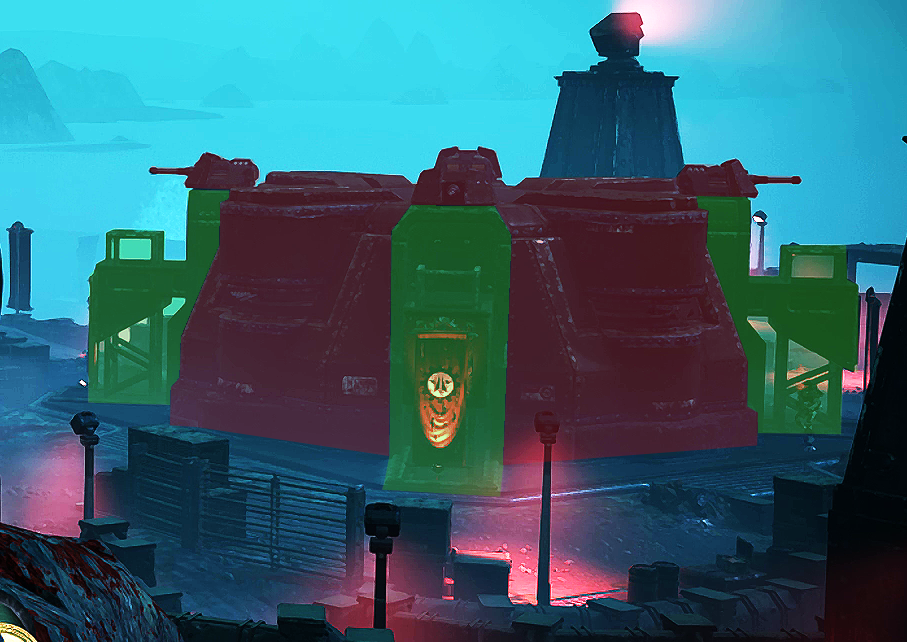
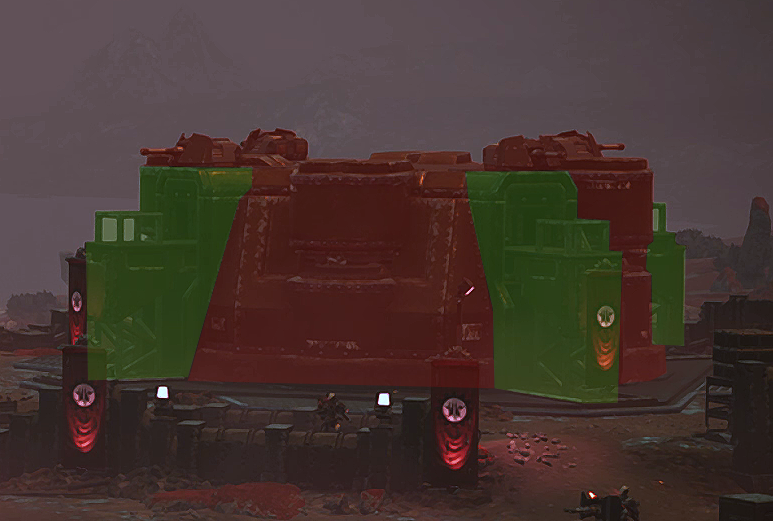
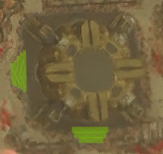
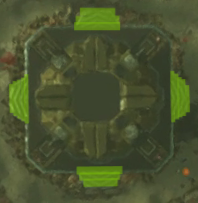
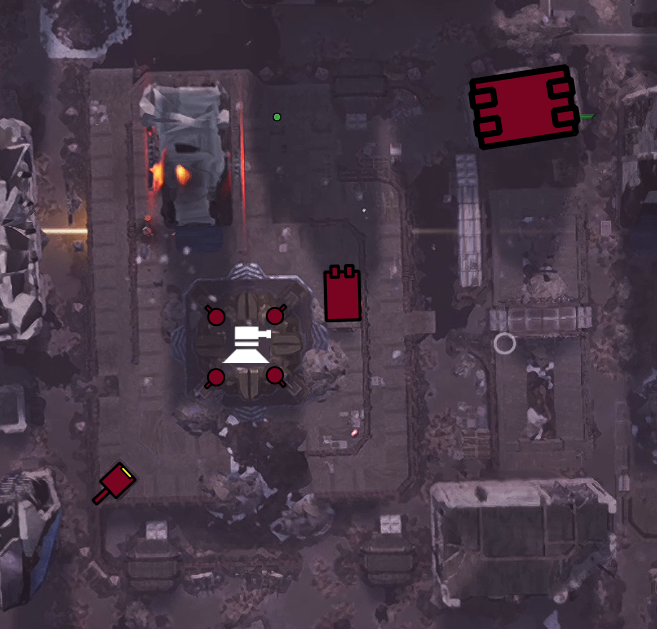
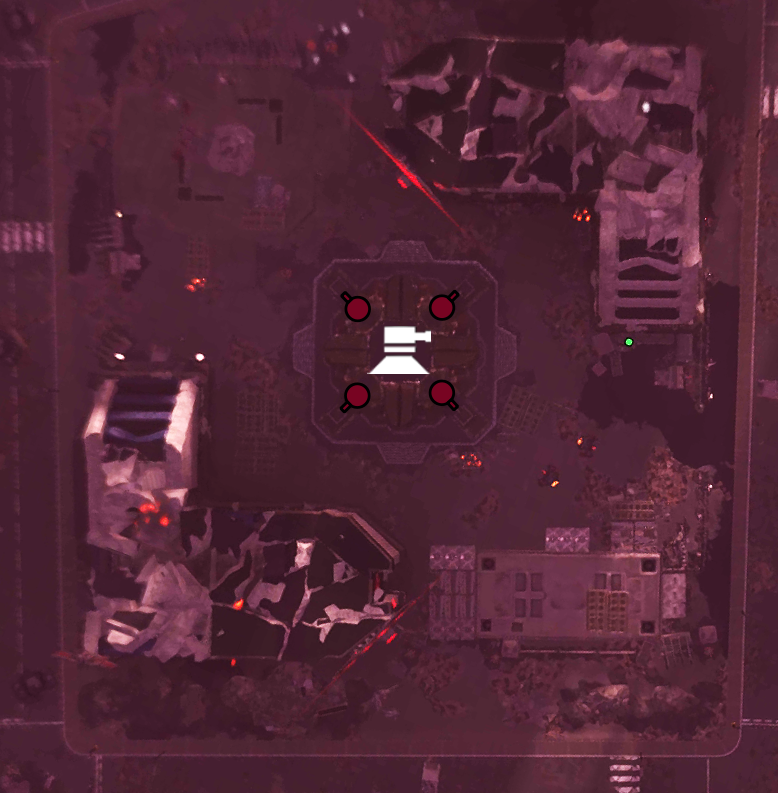
¶ Weak spot: turret underside
¶ Weakness explained
A Command Bunker has a weak point in 4 spots. You want to aim for any point in the vertical continuity of one of the top turrets. The pictures below show green as an area where you must aim at, otherwise you will need to deal much more damage to destroy it.
¶ Weapons table
Anti-Tank weapons are the most appropriate ones to deal with Command Bunkers. This video shows an execution example for each of the weapons below.
| Stratagem/Weapon | Level/Warbond | Cost | Shot(s) |
|---|---|---|---|
| 3 |  3.000 3.000 |
2 | |
| 5 | 6.000 |
2 | |
| 15 | 8.000 |
4 | |
| 18 | 7.500 |
2 | |
| 20 | 9.000 |
1 | |
 Dust Devils Dust Devils |
 110 110 |
1 | |
| Urban Legends |
110 |
4 | |
 Thermite grenades Thermite grenades |
Democratic Detonation |
15 |
2 |
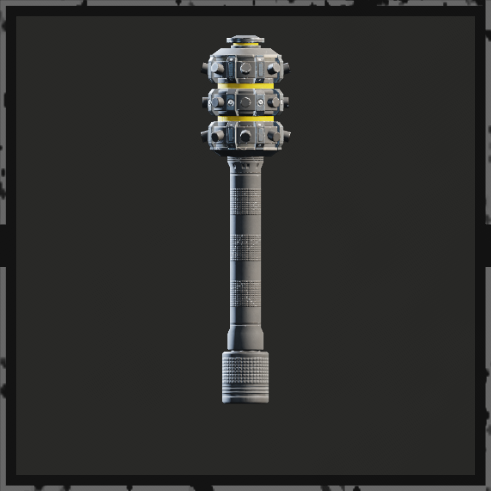
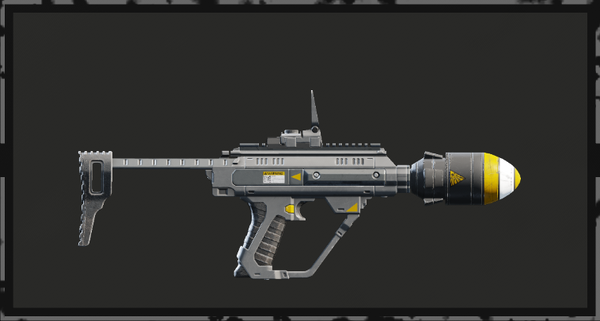 Ultimatum Ultimatum |
Servants of Freedom |
40 |
2 |
¶ Red stratagems table
Red stratagems are very good ways to destroy Command Bunkers. Some SEAF Artillery shells can deal with it too.
| Stratagem | Level | Cost | Notable Info |
|---|---|---|---|
| 1 | / | Has to directly hit the Bunker's weak point | |
| 1 | 4.000 |
You need 2 of them | |
| 5 | 4.000 |
/ | |
| 5 | 4.000 |
/ | |
| 10 | 7.500 |
You need 2 of them | |
| 10 | 7.500 |
/ | |
| 15 | 10.000 |
You need 2 of them | |
| 15 | 10.000 |
Can prioritise destroying heavy enemies in its path | |
| 20 | 10.000 |
Can one shot but has heavy hit and targeting RNG |
Mini-Nuke:
- Similar to a Hellbomb.
- Can hit any part.
High-Yield Explosive:
- Similar to an Eagle 500kg Bomb.
- Has to directly hit the Bunker's weak point OR 2 of them can hit any part.
Explosive:
-
Similar to an Orbital Precision Strike.
-
Has to directly hit the Bunker's weak point.
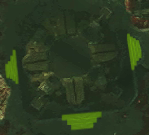
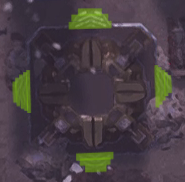
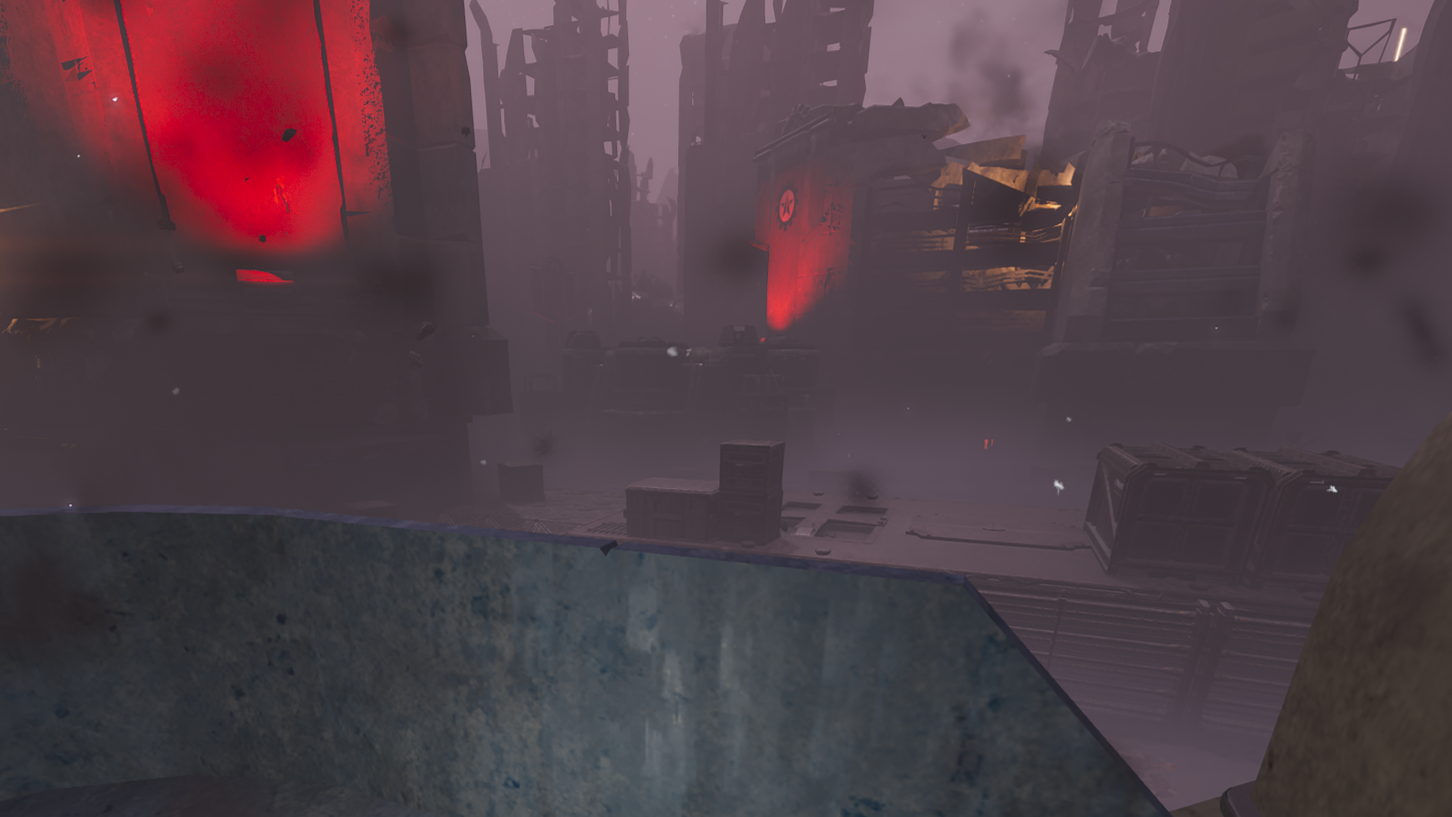
¶ Weak spot: killing pad
¶ Weakness explained
The structure of the bunkers features metal pads like the one shown in the picture.
This is a weak point that can be destroyed with any type of pod: the one our Helldiver comes out of, a support weapon pod, a resupply pod, etc.
One pod: one tap.
The best red stratagem to use is the Orbital Precision Strike.
¶ Pods and OPS
¶ Pads per variant
| Variant | Pads | Pads on snow biome |
|---|---|---|
| Bridge | 2 or 3 | 2 or 3 |
| Cliff Hanger | 1 | 1 |
| Trio | 4 | 4 |
| Twins | 2 or 3 | up to 4 |
| Father and Son (Megacity only) | 4 | / |
| Lonely (Megacity only) | 4 | / |
Although the symmetrical nature of the bunker suggests the presence of 4 killing pads (1 per side), not all bunker variants have all 4 visible.
The number of visible pads can vary, both because of the variant itself and because of the terrain elevation. Like other structures (such as fabricators), bunkers can be partially below ground level.
Megacity bunkers always have 4 pads because the elevation is very low and they are not generated on earthen ground.
The numbers shown in the table should not be taken as gospel. However, they reflect observations made on a dozen or so bunkers of each type.
The pads seem to act as areas where you can steer with the Hellpod. The higher the number of pads, the larger and more forgiving the area. However, there are cases where steering the pod is practically impossible, such as with the single pad of Cliff Hanger. Megacity bunkers are the most convenient for steering the Hellpod to a pad.

¶ Variants
¶ Bridge
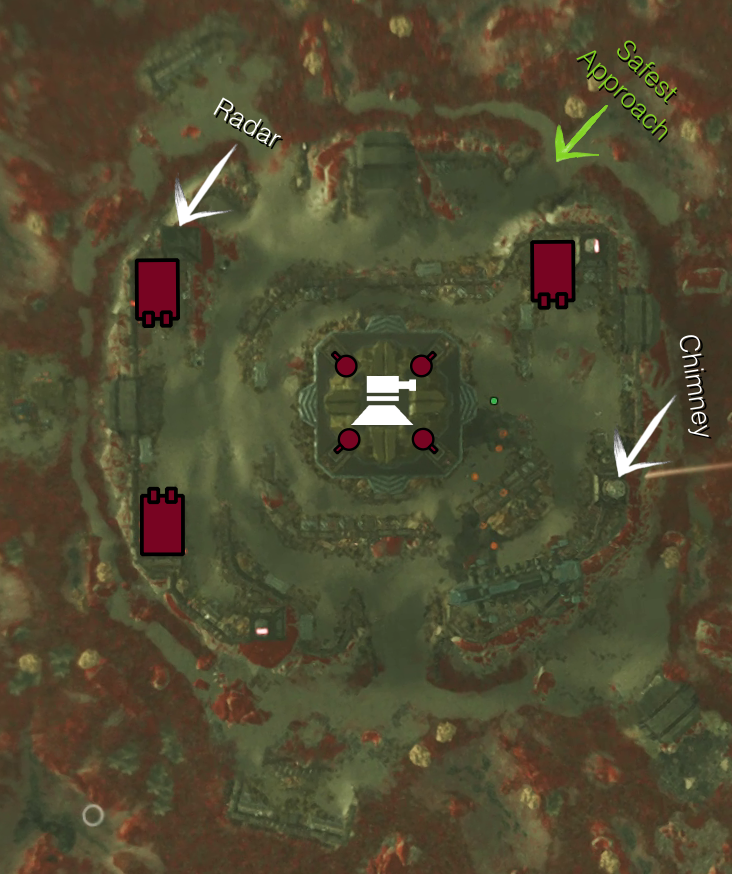
There is no safe path for planting a (Portable) Hellbomb.
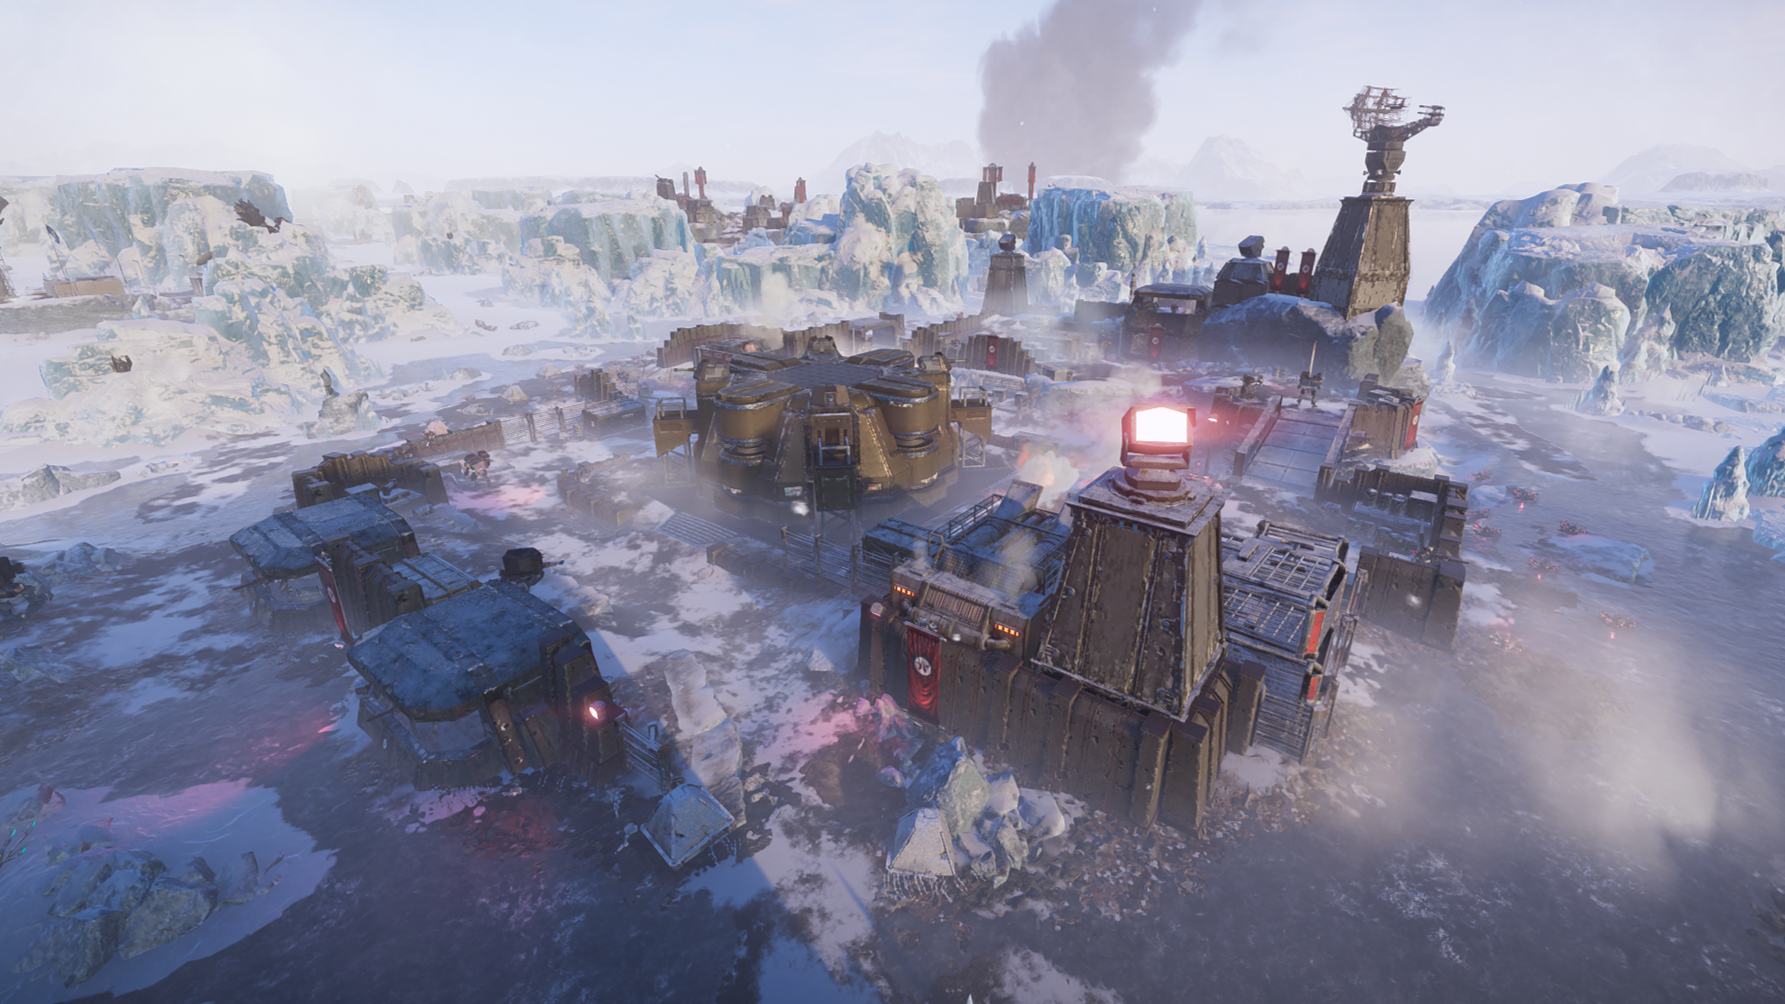
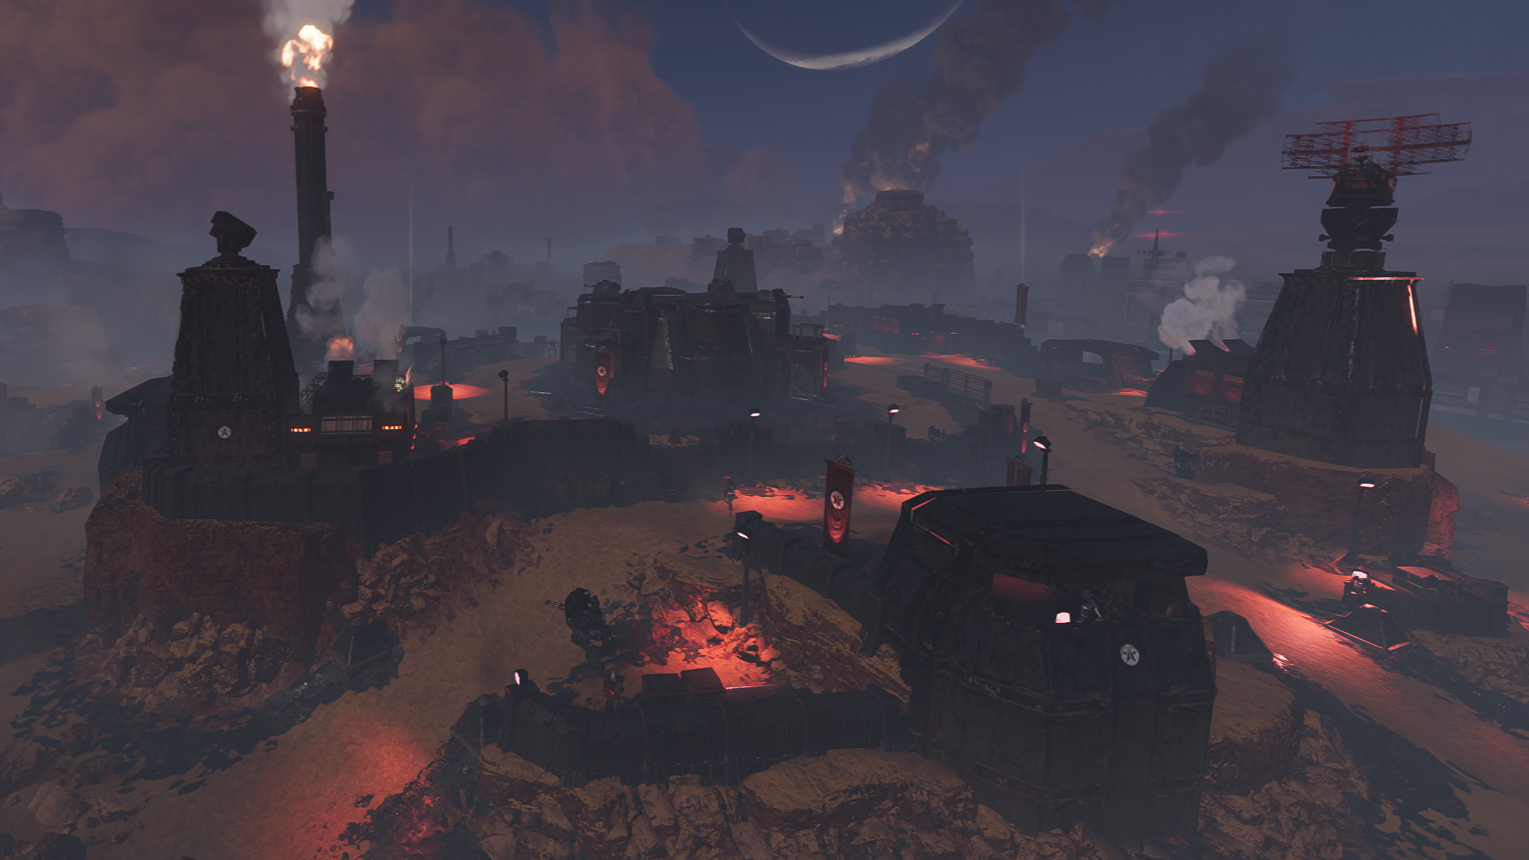
This variant features an Automaton radar but no chimney. A bridge connects the part with the radar to the part with the bunker. A crane may spawn.
2 fabricators are located on either side of the outpost.
Number of killing pads: 2 or 3.
¶ Identifying Features
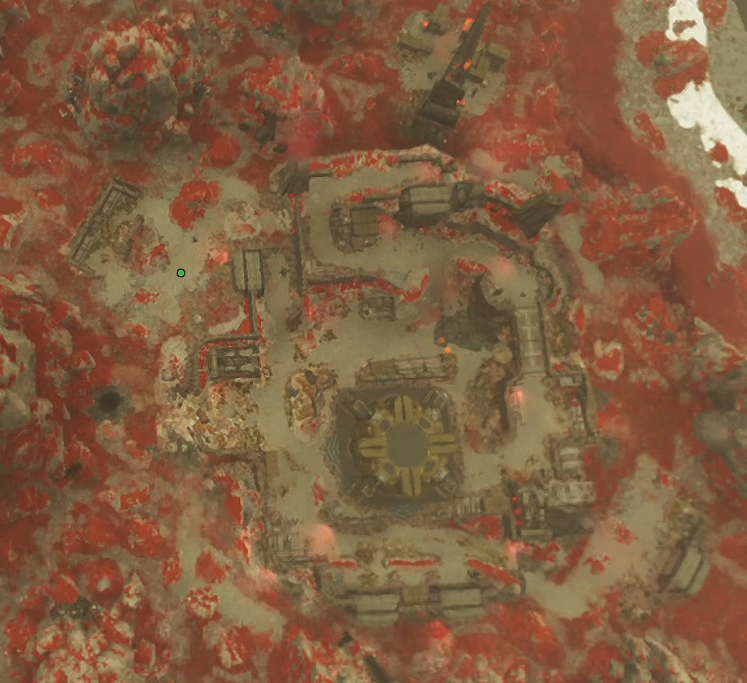
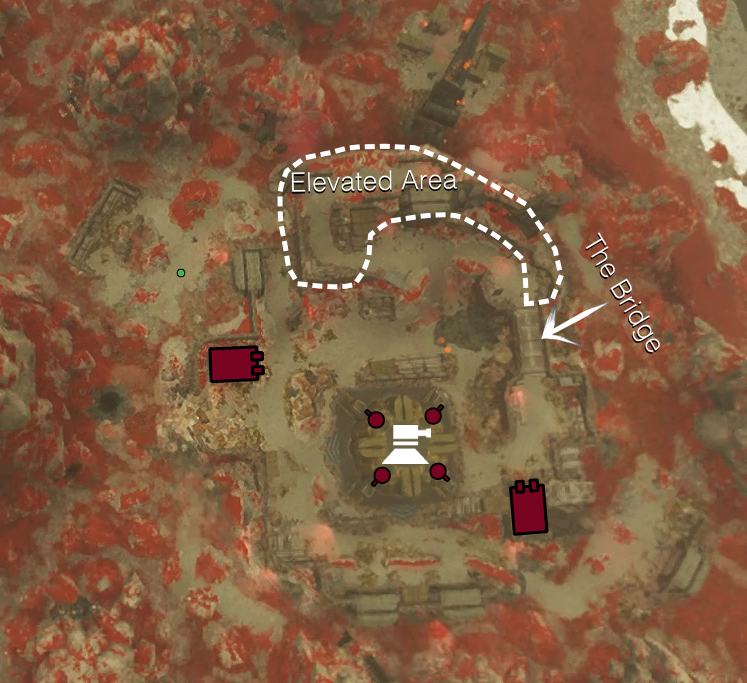
Visually: There is an elevated area surrounding north of the bunker and a bridge to its right.
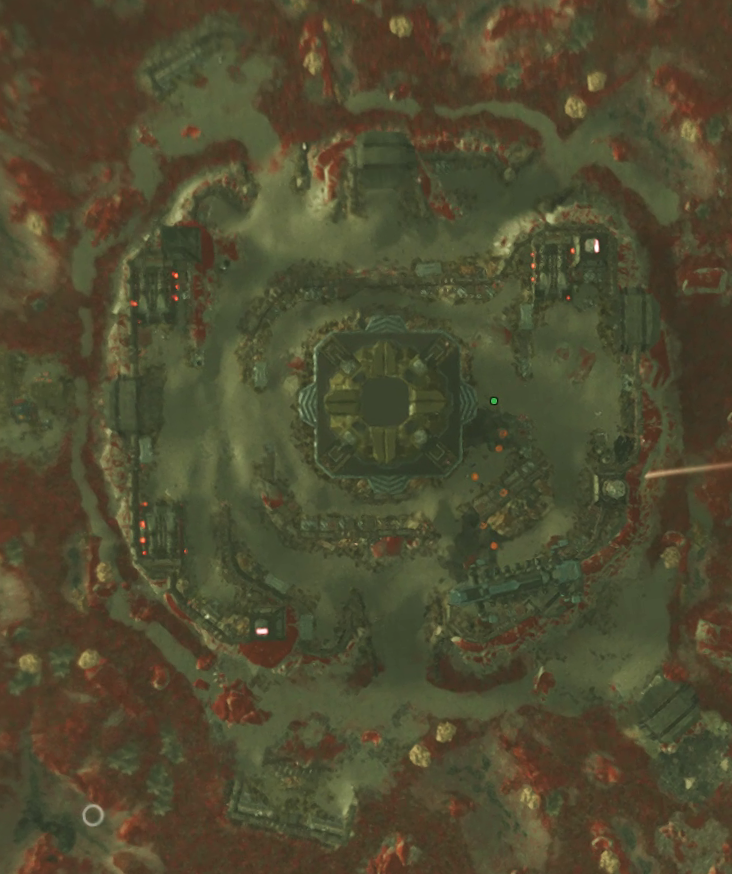
On the map: There is a bridge to the right of the bunker.
¶ Layout
¶ Cliff Hanger
There is a safe path for planting a (Portable) Hellbomb.
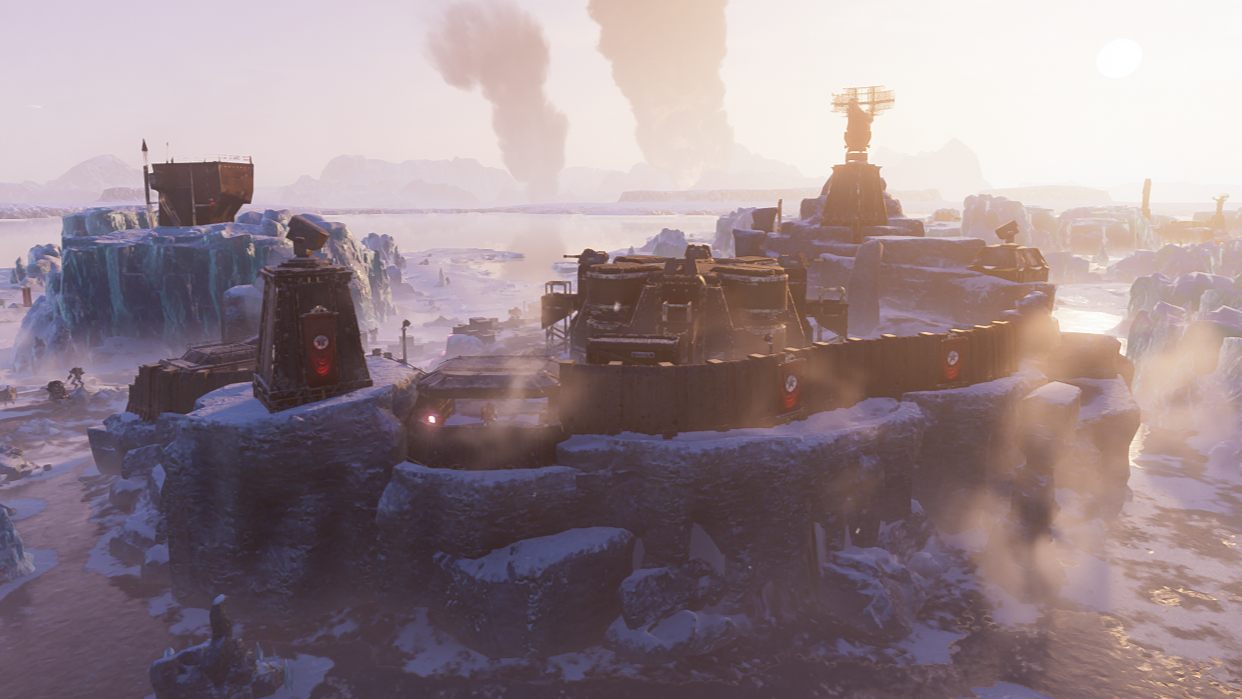
This variant features an Automaton radar but no chimney. The radar is located at the top of a cliff surrounding the bunker. The entire outpost is elevated.
2 fabricators are located on either side of the outpost.
Number of killing pads: 1, and you cannot steer there.
¶ Identifying Features
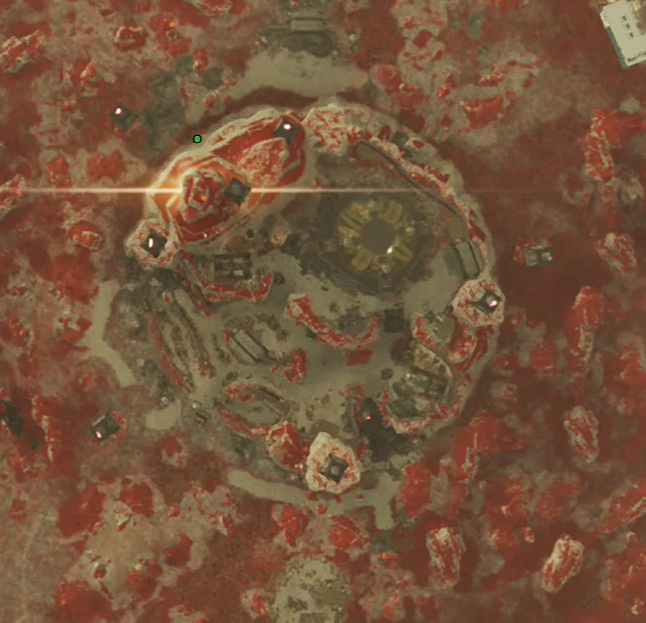
Visually: The bunker is surrounded by a half-moon shaped cliff, on top of which stands an Automaton radar.
On the map: The bunker is in the corner of the outpost and is surrounded by a half-moon shaped rock formation. There are 4 small dark grey squares which correspond to Automaton light spots.
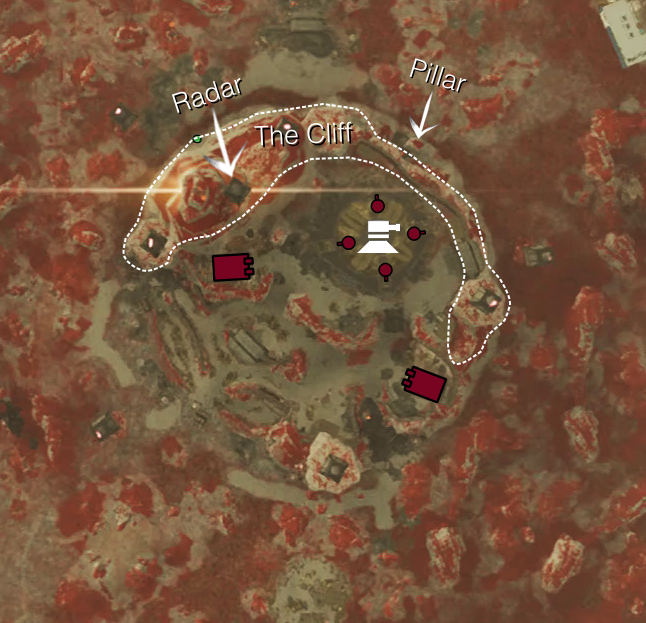
¶ Layout
¶ Safe (Portable) Hellbomb planting
Approaching facing the half-moon shaped cliff, you will see a rock pillar.
Call the (Portable) Hellbomb into the space between this pillar and the cliff.
¶ Trio
There is a safe path for planting a (Portable) Hellbomb.
This variant features an Automaton radar and a chimney.
It is the only variant to have 3 fabricators. 2 face each other and the third is located on the other side of the outpost.
Number of killing pads: 4
¶ Identifying Features
Visually: There is a chimney and an Automaton radar on either side of the outpost.
On the map: The bunker is perfectly centred in the outpost.
¶ Layout
¶ Safe (Portable) Hellbomb planting
You must enter the outpost via the path that leads to the radar. This may require fighting enemies.
You will be protected from the bunker turrets by a wall. As soon as you reach the pile of rubble at its base, call in the (Portable) Hellbomb.
¶ Twins
There is a safe path for planting a (Portable) Hellbomb.
¶ Overview
This variant has an Automaton radar and two twin chimneys. A crane may spawn.
2 fabricators are located back-to-back, right next to the bunker.
Number of killing pads: 2, up to 4 on snow biome.
¶ Identifying Features

Visually: Twin chimney side by side and an Automaton radar.
On the map: Two fabricators back to back to each other right next to the bunker in a rectangle-shaped outpost.
¶ Layout
¶ Safe (Portable) Hellbomb planting
You need to call the (Portable) Hellbomb outside the outpost, roughly at the foot of the twin chimneys.
¶ Megacity variants
¶ Father and Son
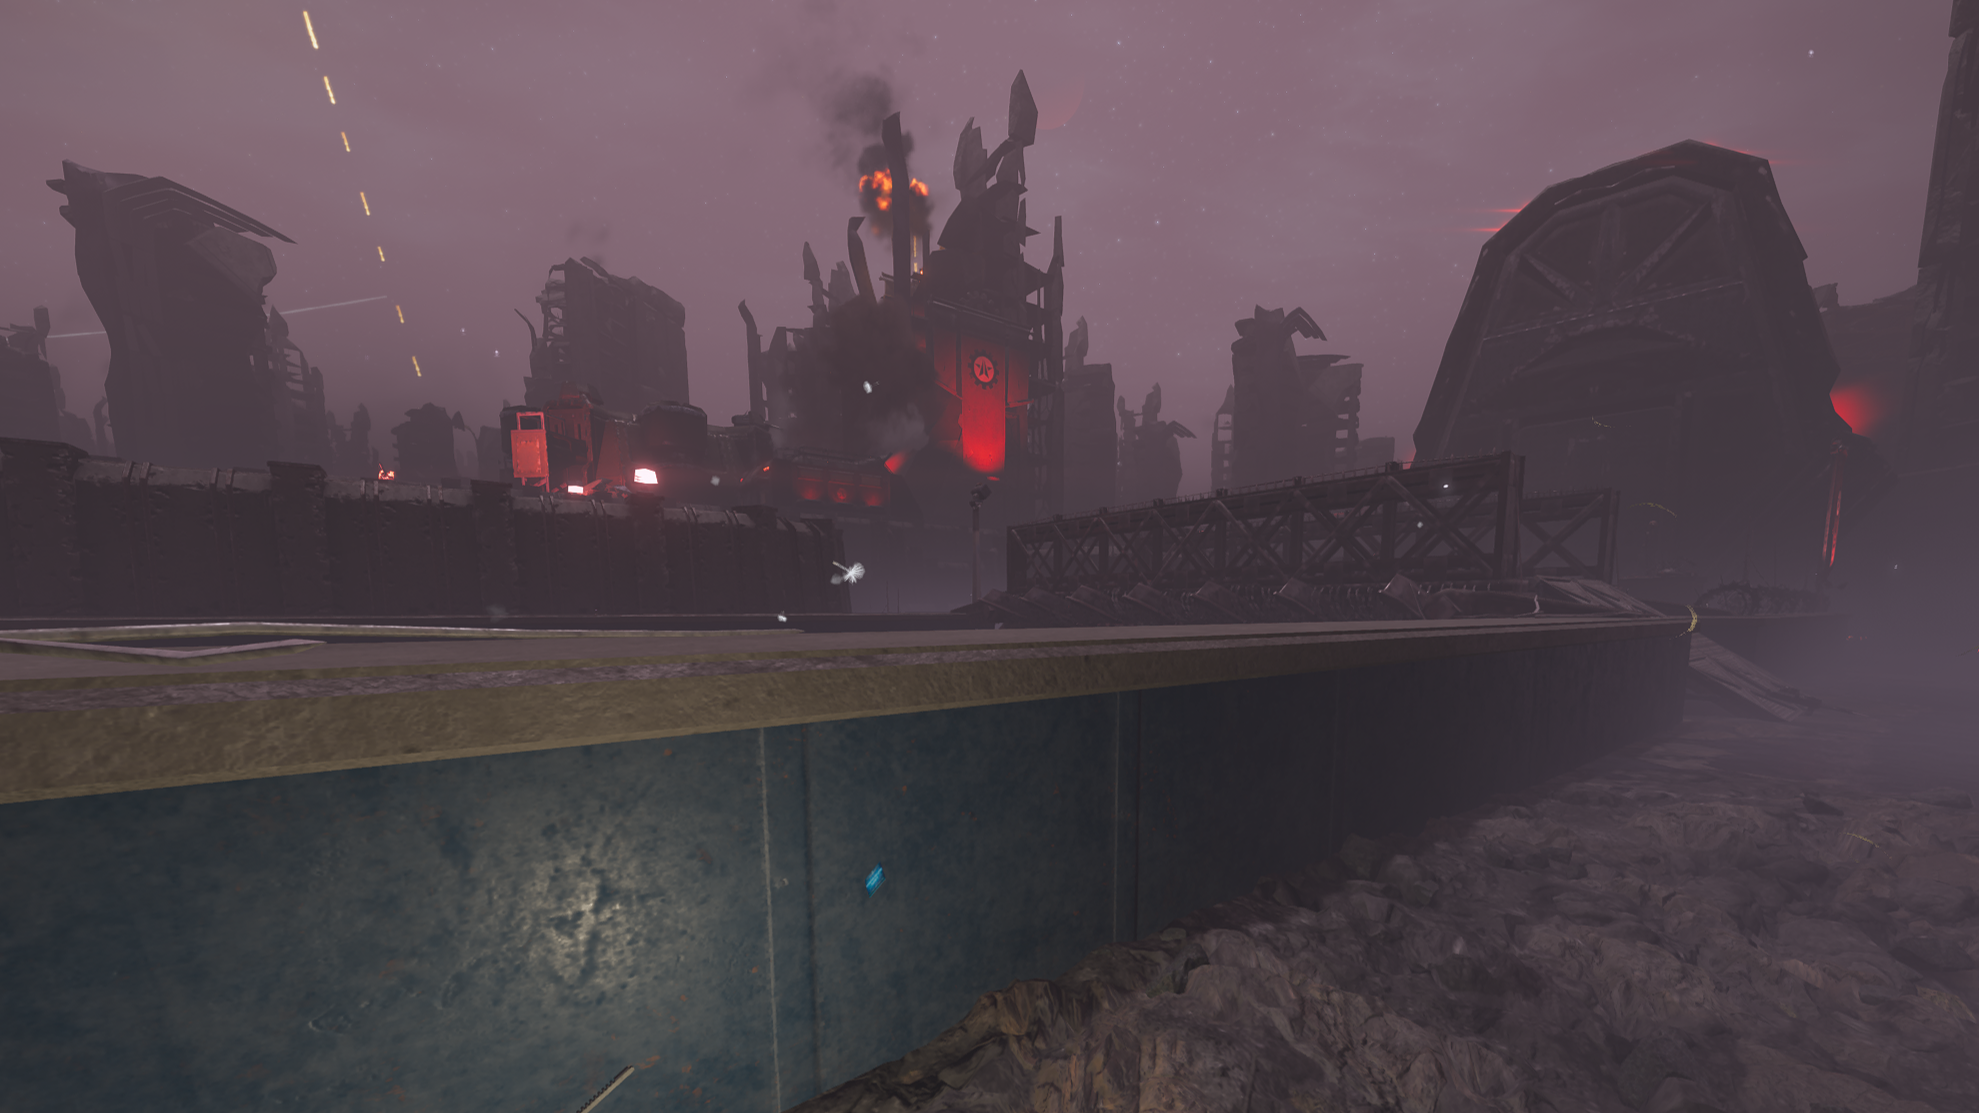
This variant features a skyscraper right next to the bunker and a heavy turret.
A bulk fabricator and a fabricator are located in the outpost.
Number of killing pads: 4
¶ Identifying Features
Visually: The bunker is surrounded by: a skyscraper, a fabricator, a bulk fabricator, and a heavy turret.
On the map: A bulk fabricator is located within the outpost compound.
¶ Layout
¶ Lonely
This variant contains no defensive structures (heavy turret, bunker turret) or spawners (fabricator, bulk fabricator).
This is the only variant where the bunker is lonely, solely surrounded by skyscrapers.
Number of killing pads: 4
¶ Identifying Features
Visually: The bunker is not surrounded by any Automaton structures. This is the only variant where the bunker is lonely.
On the map: The bunker is surrounded by two sets of L-shaped skyscrapers.
¶ Layout
¶ Speedrun Clears
¶ Multiplayer Clears
¶ Canis, Jaesa, Rose, MuxaRez
Patch: 1.002.203.
3 different techniques were used:
-
MuxaRez used the Ultimatum (1 hit Bunkers until patch 1.002.203 as long as their weak point was aimed).
-
Canis and Rose used the Commando.
-
Jaesa used an Orbital Laser and fired an Ultimatum shot to speed up its destruction.
¶ Canis, Rose, Bunji, Walloper
Patch: 1.002.203.
2 different techniques were used:
-
Rose used the Anti-Tank Emplacement to destroy 2 Bunkers.
-
Walloper used an Orbital Laser to destroy 1 Bunker and the Anti-Tank Emplacement to destroy a second one.
¶ Solo Clears
¶ G00DzON
Patch: 1.004.002.
Both bunkers were destroyed with the killing pad repod technique.
¶ Jaesa
Patch: 1.002.203.
4 different techniques were used, one per Bunker:
-
Red stratagems: Orbital Laser and Orbital Walking Barrage.
-
Blue stratagems: Spear and Commando.
¶ Credits
Hadokken for the Commando strategy.
LilGMan for the Spear strategy.
G00DzON for variant identification, safe (Portable) Hellbomb planting guide video, identifying features layouts, red stratagem testing, support weapons testing and video, killink pod strategy and videos.
Jaesa for formatting, bunker variant pictures, map layouts and killing pads layouts.