¶ Overview
(Legacy code names: Hard Climb, Cliff)
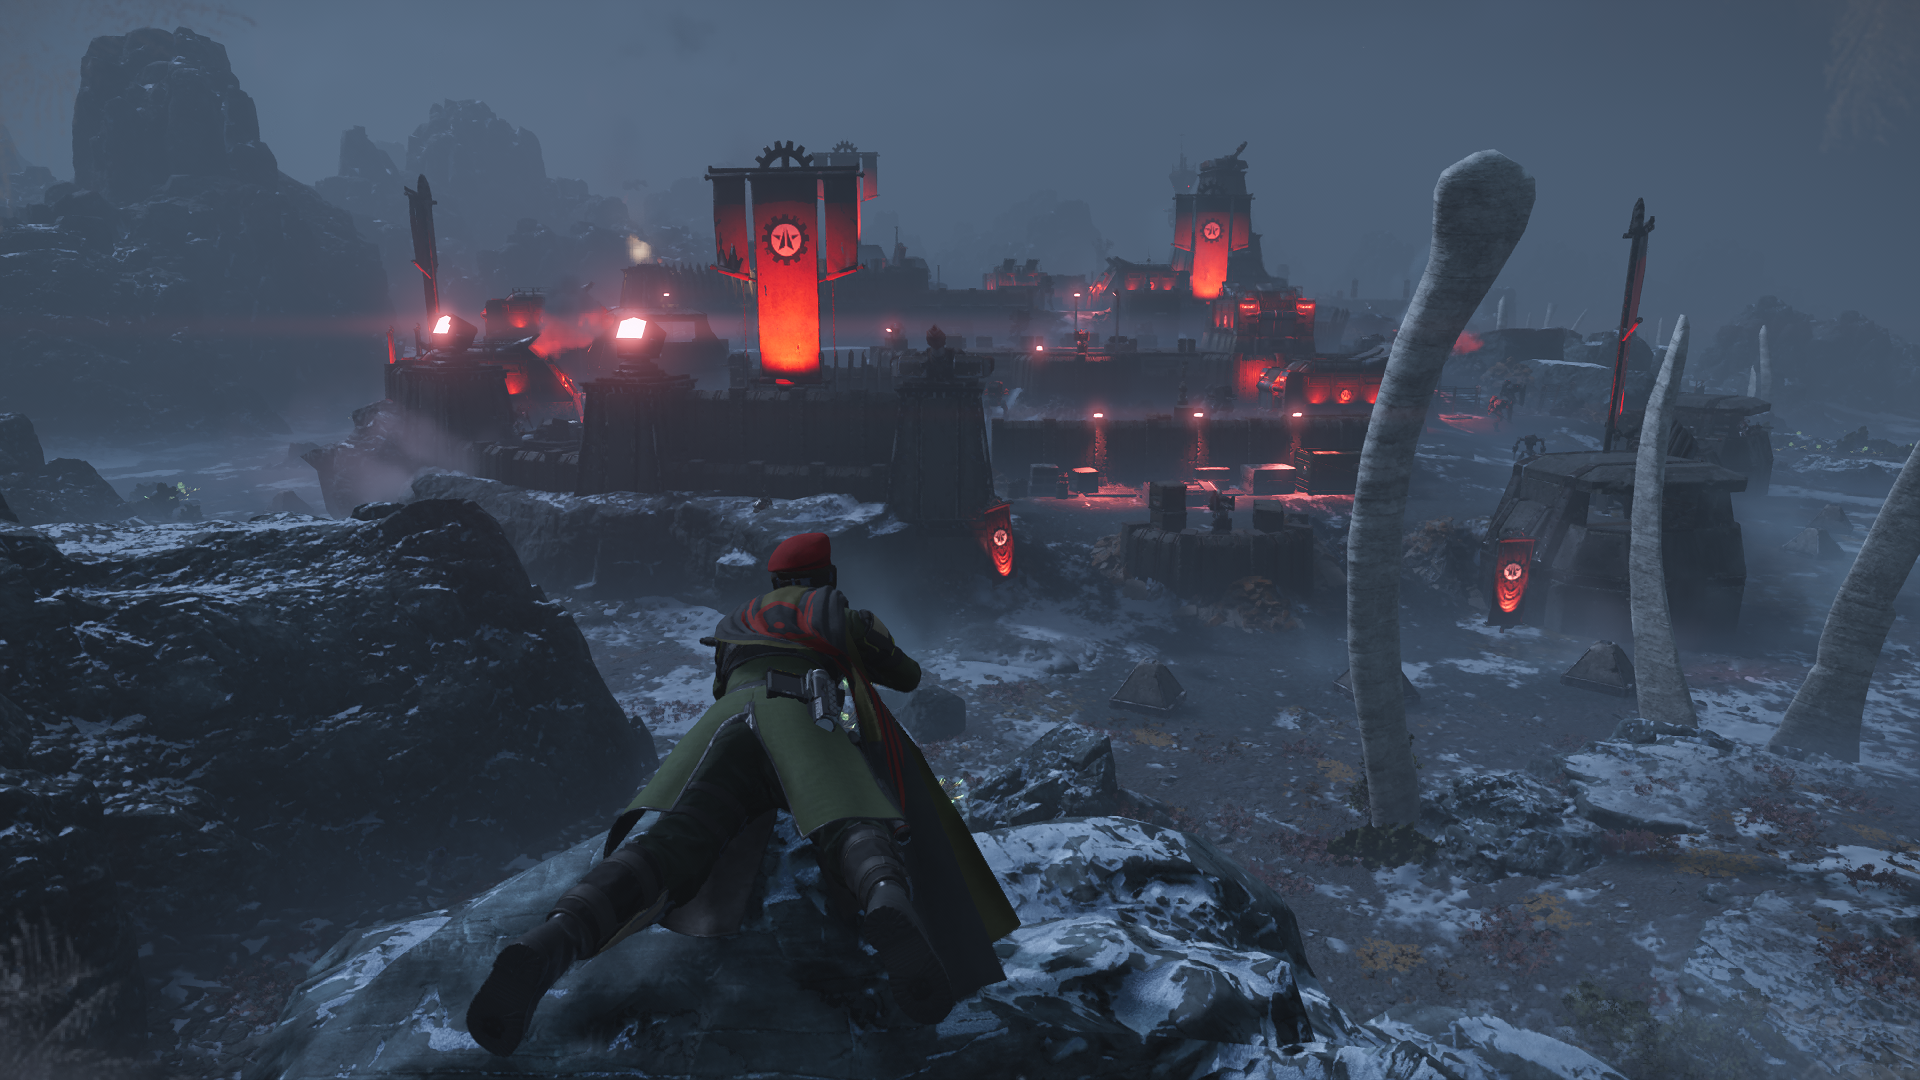
Named because the traditional access route is underneath a cliff and the climb up is more difficult because you can get ambushed at the top.
An easy way to identify this fortress variant is that it looks like a circle on the map
¶ Identifying Features
Visually: Circular fortress, No smoke stacks, no Detector Tower
On the map: Perfect circle on the map
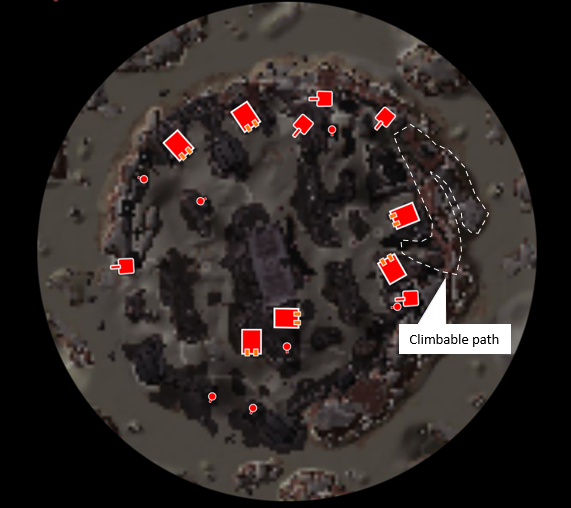
¶ Climbable path
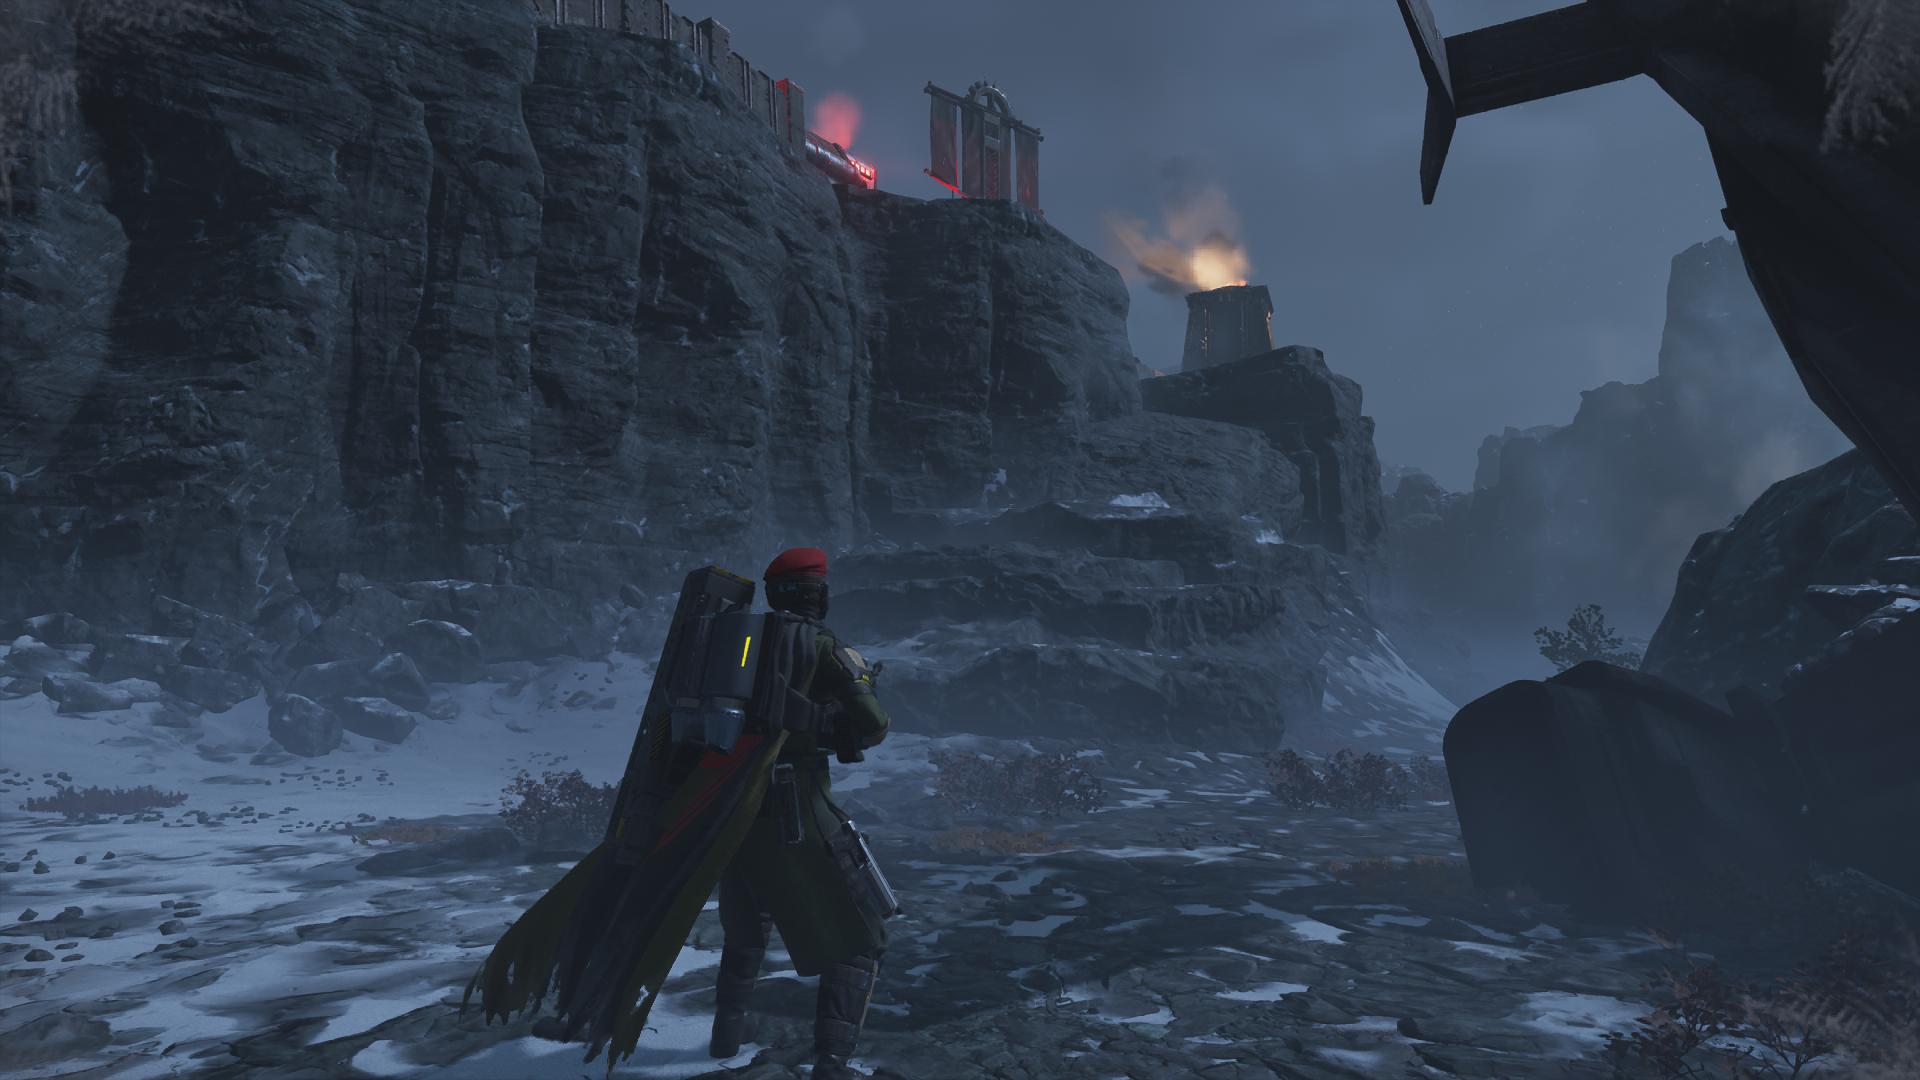
Taking this climb up the back will take you to a high ground spot where you can destroy many of the fabs in the fortress. It was called hard climb because there is a nasty surprise waiting for you at the top of the mountain path. A cannon turret and a bunker turret are guarding the way up. You can bypass these by going left once you get up the mountain path, which will put you directly in front of two fabricators and at a high vantage point for the rest.
¶ Outpost Clears
¶ Canis's Clear
Strategy possible as of Patch 1.001.102
https://youtu.be/utFI940QQrQ?t=99
The most risky clear in the new patch, although it doesn't take much longer than Crane or Bunker Hell since it requires about the same amount of repositioning. I start at the bottom of the climb before moving up to sneak along the wall, making sure to dive whenever I am exposed. I climb on top of the bunker turret and get the two fabs in front of me with 500kg before commandoing the fabs farther away. I then hide behind the rubble and destroy the last two fabs with my other 500kg.
¶ Clark's Clear
Eagle 500kg + Orbital Precision Strike + Commando
Risk: 10/10
Difficulty: 10/10
Style: 11/10
Risky and impractical, but goddamn does it look cool. Hard to see in the video but while I jetpack from the fortress I call an OPS mid-air and throw it on the last 2 fabs. In Canis' video she uses a second 500kg but I use an OPS so I can jetpack out of the base 2 seconds faster. This one takes a lot of practice but if you can pull this off then props to you.
Approximate time to clear: 45 seconds
¶ Thiccfila's Clear
https://youtu.be/e31pRbrY40o?t=265
this is an example of a non speedrunners solo clear.