¶ Overview
Any% speedrun revolves around 2 major aspects:
- Main objective completion.
- Death optimization.
In most missions, the fastest way to end them is not to extract yourself, but to deplete reinforcements. The most competitive Any% runs are competing for a handful of seconds, sometimes milliseconds. Death optimization is based on 3 key principles:
- Weapon choice and usage.
- Landing position.
- Squad size.
¶ Die faster
¶ Weapon choice
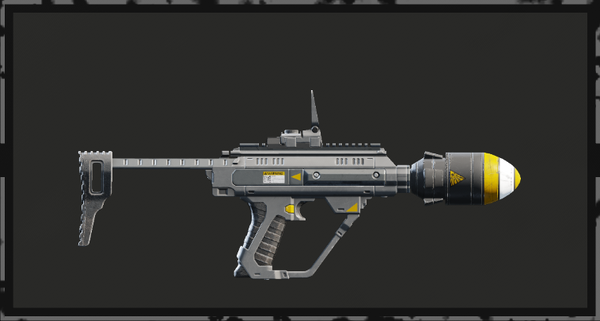
So far, 3 weapons, all found in Premium warbonds have been identified. As of today, Eruptor is the most reliable way to kill yourself. Crossbow is also a good choice, but its bolts tend to glitch more in structures and even the ground.
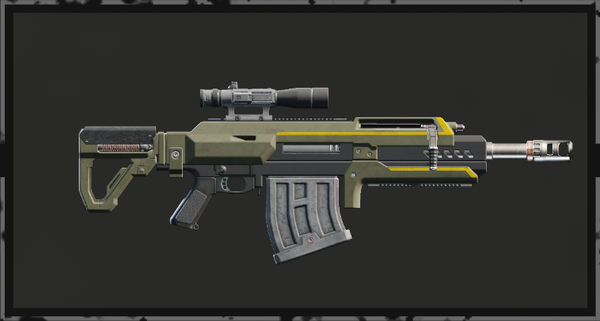

| Name | Category | Warbond | Page | Cost | Can one-shot medium armor? |
|---|---|---|---|---|---|
| Eruptor | Explosive |  Democratic Detonation Democratic Detonation |
2nd |  60 60 |
Yes, but only if shrapnel hits the Helldiver's body |
| Exploding Crossbow | Explosive | Democratic Detonation |
3rd | 80 |
Yes, if Fortified passive and Vitality Enhancement booster aren't picked |
| Ultimatum | Special Secondary | Servants of Freedom |
2nd | 40 |
Yes |
¶ Mouse movement
As soon as you hear/see the Hellpod's lid pop off, start moving your mouse downwards while holding down the fire button, without trying to aim.
This way, your Helldivers will fire at their feet as soon as possible.
If your Hellpod is stuck in a structure or rock, rotate so that you are aiming at one of the metal pads on your Hellpod. Otherwise, the shot may collide with an invisible wall. A good alternative is to use the Draw! Ultimatum exploit.
¶ Draw! Ultimatum trick
Although the velocity of Ultimatum ammunition is slower, the Draw! emote allows you to destroy nearby spawners (fabricators, warp ships, holes) as well as target enemies (hulks, factory striders, bile titans, etc.).
It also allows you to consistently die when you repod into textures that tend to make the Crossbow’s / Eruptor’s ammunition bounce (buildings, holes, rocks, slopes, etc.).
-
Purchase the Draw! emote in the Superstore (
250) -
Equip the Draw! emote aboard a Super Destroyer.
-
While you’re repoding, press your emote key.
-
Hold down the fire button as your Helldiver exits their hellpod.
¶ Landing optimization
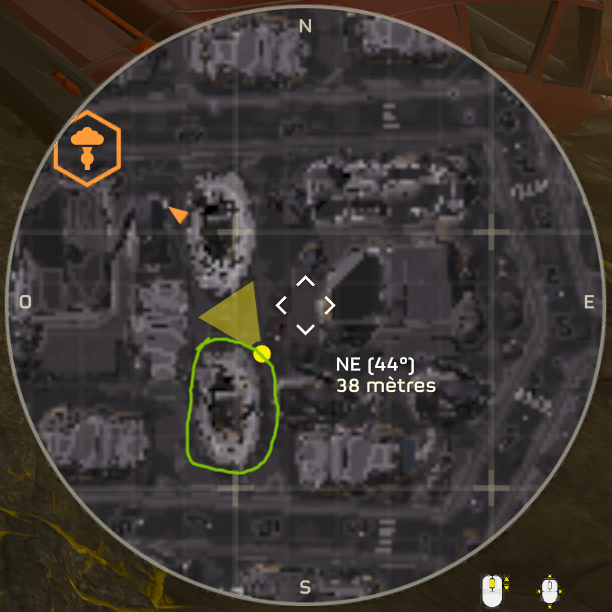
¶ Plateaus and Mushrooms
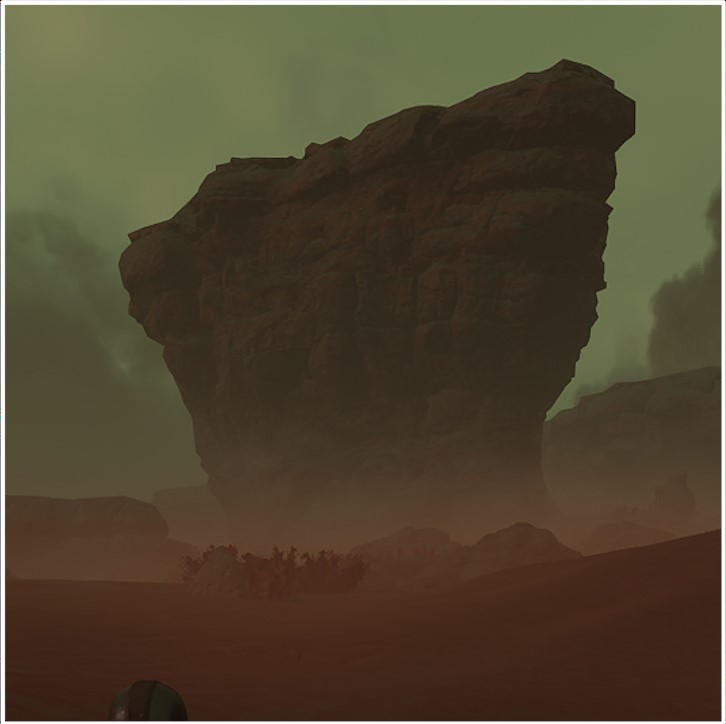
Achieving more competitive times requires landing on elevated surfaces as many times as possible.
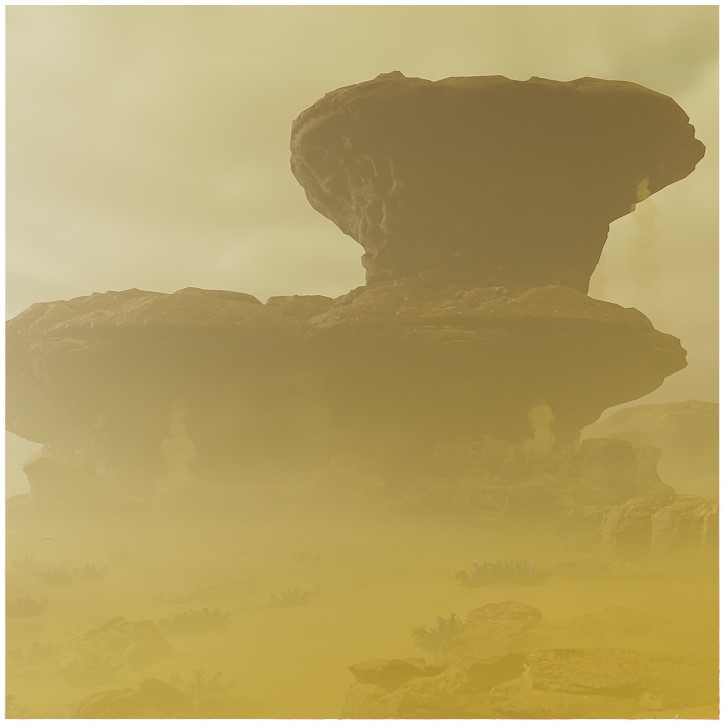
The best structures are the mushrooms and double mushrooms found in the Acidic biome (Darius II, Chort Bay, Leng Secundus, Slif, Wasat, Esker, Charbal-VII).
There are also plateaus found in the Rocky Canyons biomes (Vernen Wells, Achird III, Fori Prime).
Two things are important: the height of the mushroom/plateau and the elevation of the terrain on which it stands. The very ideal is a double mushroom on high ground.
We are not supposed to land on such structures (especially mushrooms). So expect a very unfair repod RNG.
You want to avoid the "podlock rocks" found at the foot of mushrooms/plateaus as much as possible. They tend to prevent you from landing on top of them.
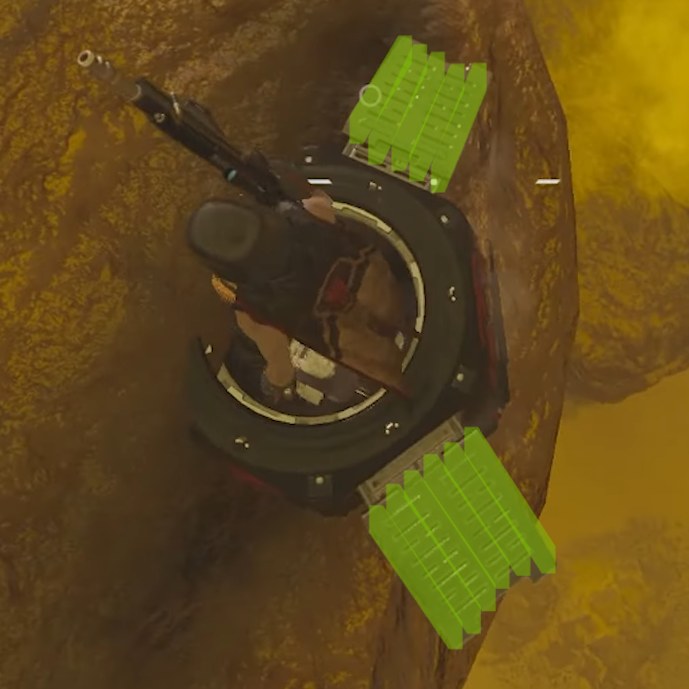
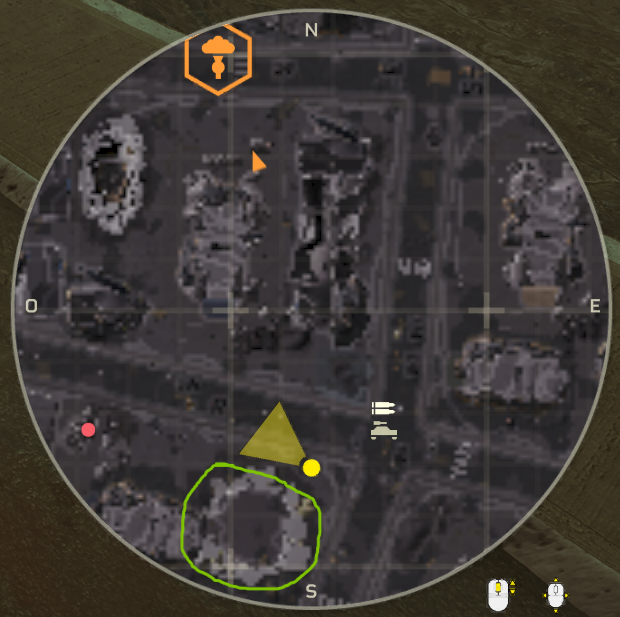
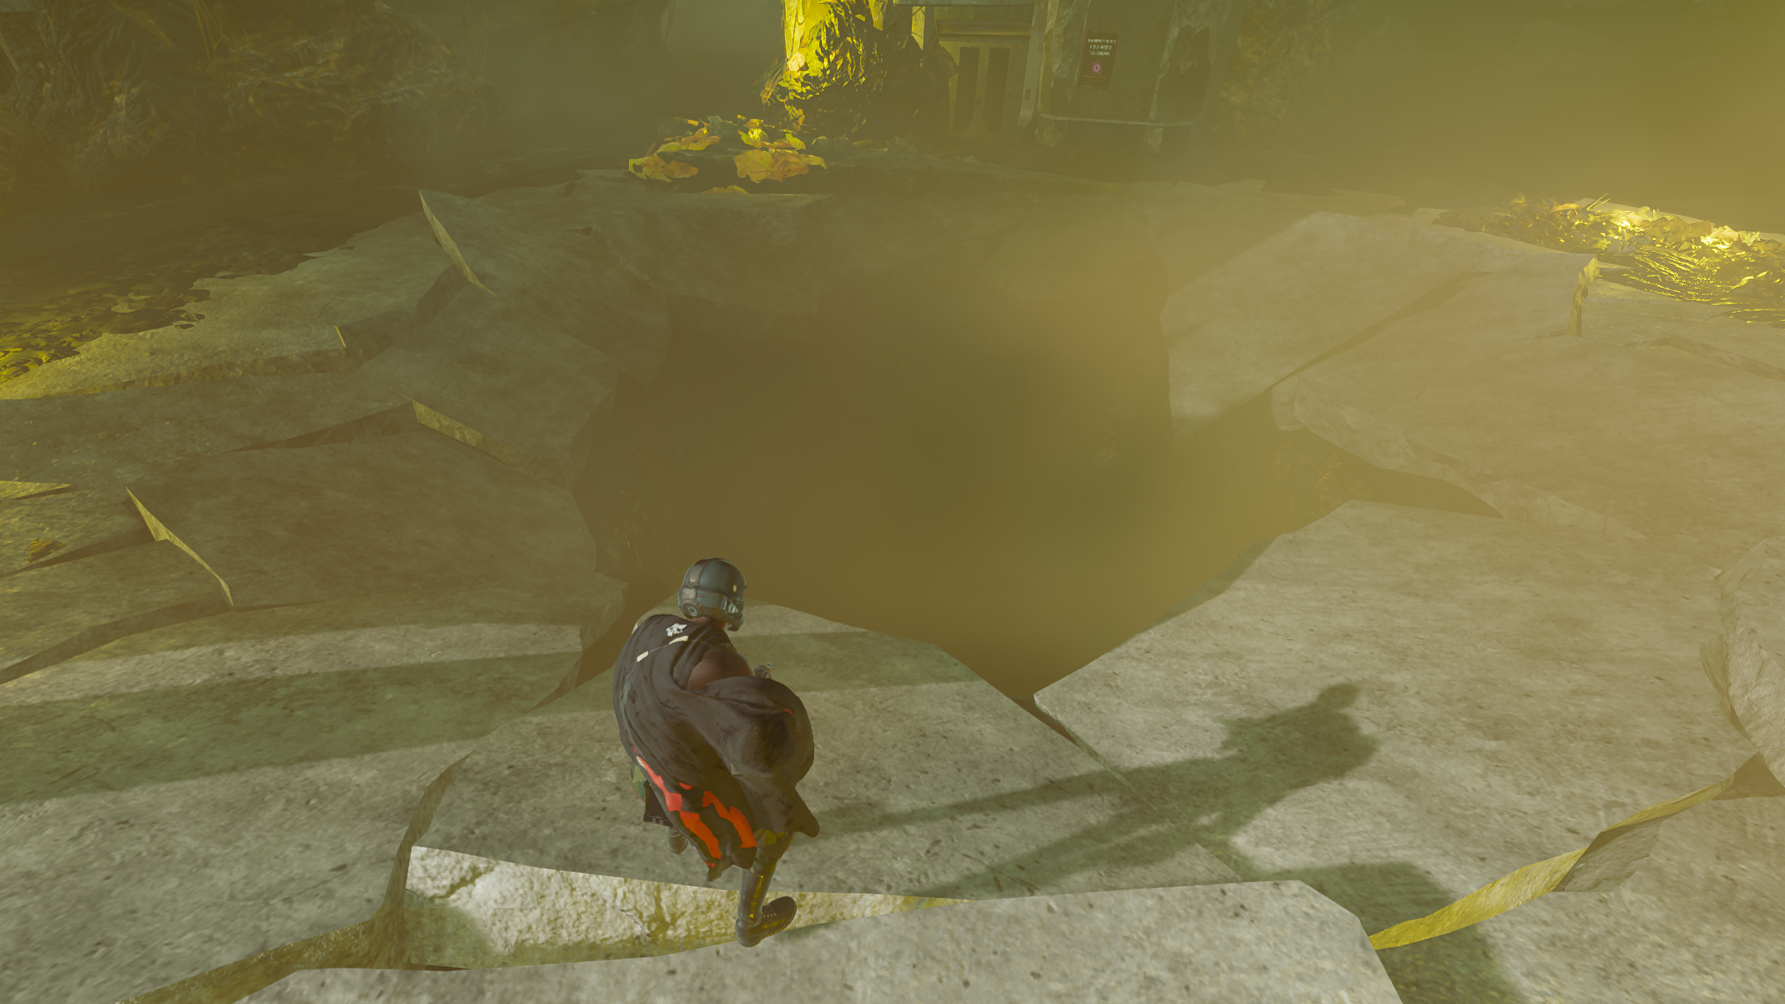
¶ Endless holes
Terminid Megacities introduced endless holes, which are currently the best method for achieving the shortest Any% runs (except when it comes to Burn em All or Instant Pelican). There are currently 2 types of holes, one of them is viable while the other one is not:
- Pipe hole.
- Endless holes.
Endless holes have been patched on 2 September 2025 with the Into the Unjust release. You can run with them on downpatch, from 1.003.101 to 1.003.303.
¶ Pipe hole
This hole variant is not viable.
Similar to the volcanic pits in the Deadlands biome (Aesir Pass, Penta, Troost, Nivel 43, Pandion-XXIV, etc.), pipe holes cause you to die more slowly because death occurs after landing and exiting the hellpod.
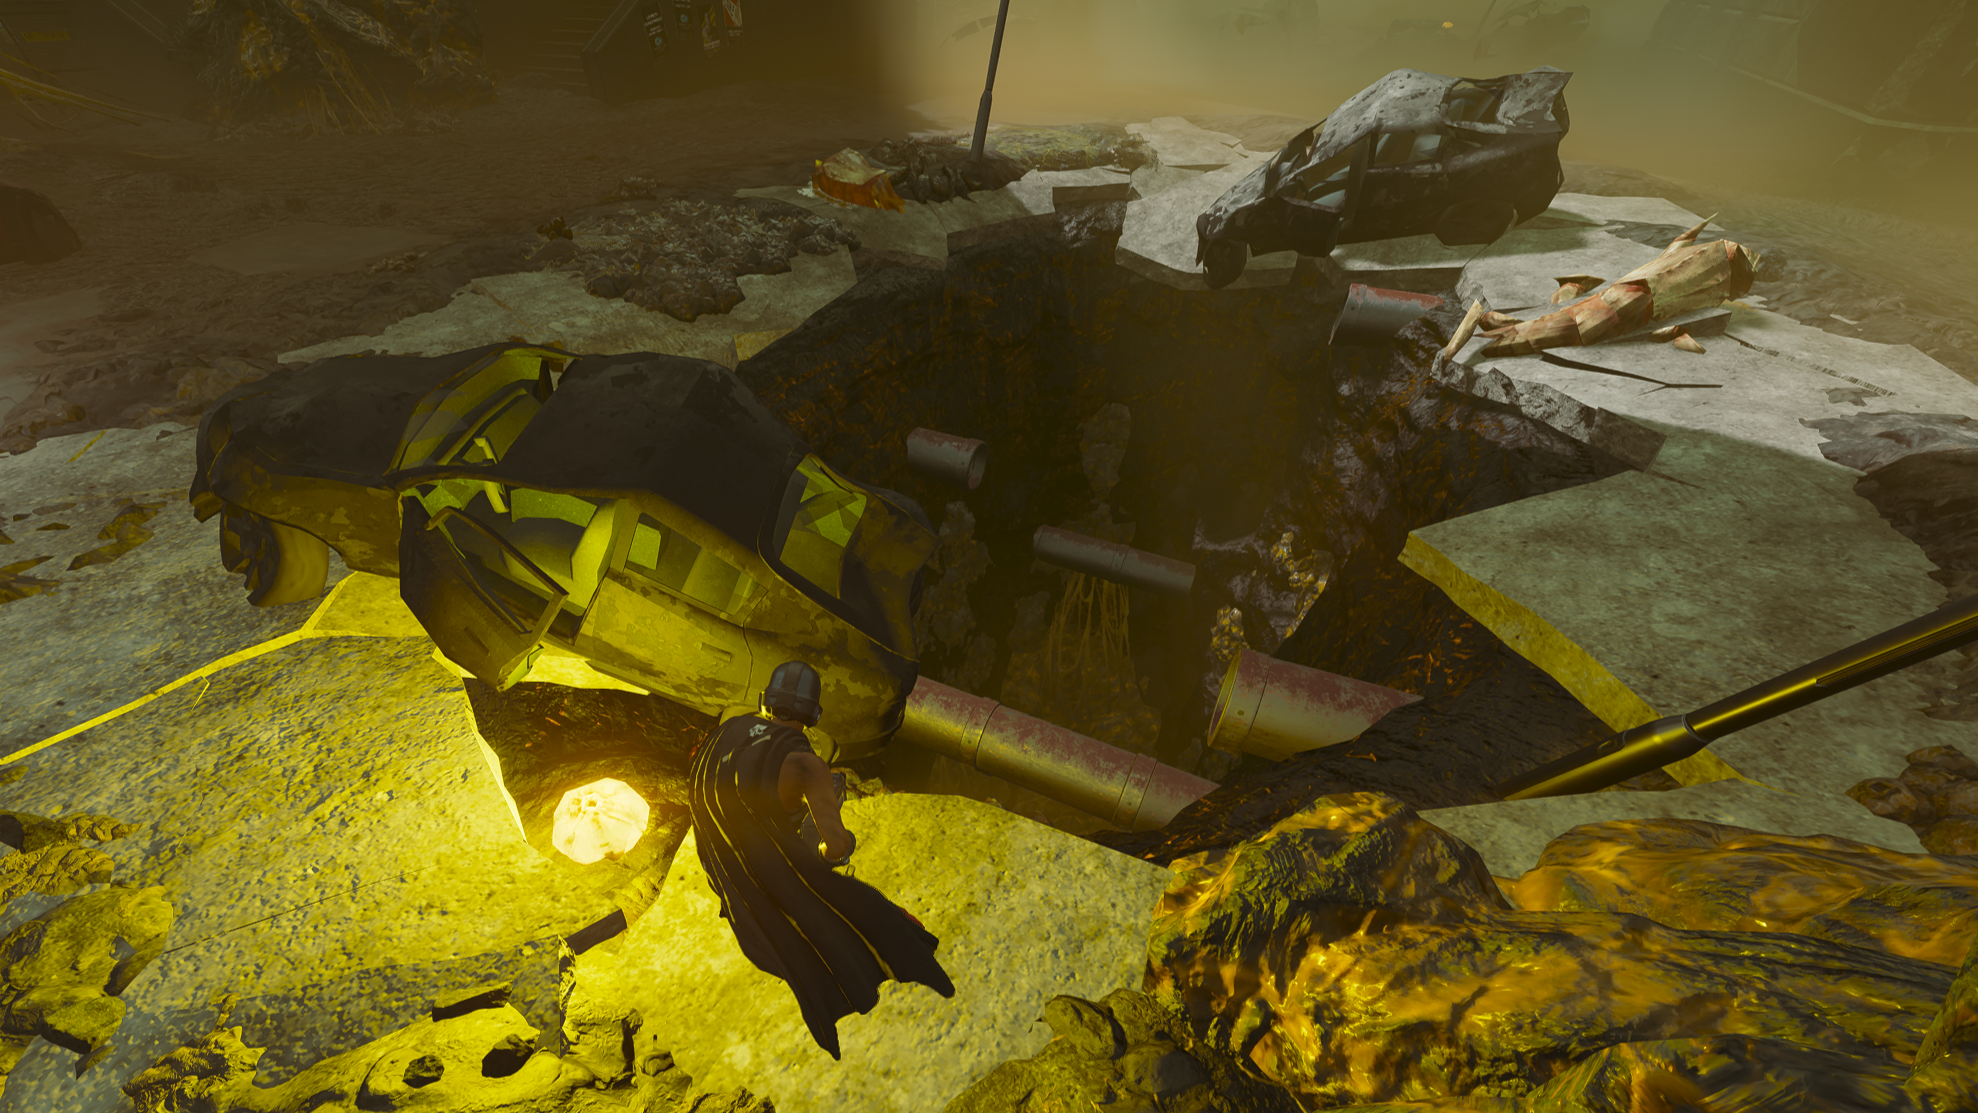
¶ Endless hole
This hole variant is viable.
This kind of hole will kill you before you get out of the hellpod, saving precious seconds with each death round. There is a smaller variant of this hole with pipes on either side. The pipes have hitboxes, so you must aim for the middle of the hole to avoid them and trigger the early death.
¶ Squad size
¶ The lesser, the better
| Squad size | Number of reinforcements |
|---|---|
| 1 | 5 |
| 2 | 10 |
| 3 | 15 |
| 4 | 20 |
Every Helldiver comes to the front with 5 reinforcements.
It doesn't matter if you're alone or a full squad, each Helldiver must die 6 times to deplete their 5 reinforcements and trigger the end of the mission.
The number of deaths per Helldiver may vary if a squad member needs to stay alive at key moments, but the count logic remains the same.
Helldivers 2 is an online network game and as such, the timer starting and ending frame depend on the quality of your connection, on how stable the servers are and on the amount of information that needs to be processed in-game.
The fewer players there are, the less information needs to be processed and the faster the respawn will be.
As a consequence, the squad should be as small as possible.
If you need more than 2 Helldivers, the others can disconnect once they have completed their route.
¶ Exceptions that prove the rule
The exception to the above rule is missions where a Helldiver must stay alive to hold an objective:
- Free Colony.
- Spread Democracy.
- Upload Escape Pod Data.
In this case, no one disconnects because it's faster to die 3 at a time than 1 at a time.
To save time, you can type in the reinforcement strategem and prepare to throw it before the others even die.
| Death round | Reinforcements left (3 players dying) | Reinforcements left (1 player dying) |
|---|---|---|
| 1 | 20 | 10 |
| 2 | 17 | 9 |
| 3 | 14 | 8 |
| 4 | 11 | 7 |
| 5 | 8 | 6 |
| 6 | 5 | 5 |
| 7 | 2 | 4 |
| 8 | 0 | 3 |
¶ Credits
Canis for the endless holes strategy, the suggestion to use Eruptor over Crossbow and the disconnection strategy.
MrKing123 for submitting a run featuring the endless holes strategy.
MuxaRez for the Draw! Ultimatum exploit.
LilGMan for advising to hold down the fire button instead of spamming it.
Helldivers Wiki for some assets and information.